
RV Waste Disposal: A No-Sweat Guide for Utah Adventurers

Let’s talk about the one job every RVer has to do: waste disposal. It’s not the most glamorous part of RV life, but getting it right is the key to a smooth and stress-free adventure. It all comes down to properly emptying your black tank (sewage) and gray tank (sink/shower water) at a designated dump station. There's no getting around it, but our team at Motor Sportsland is here to make it easy.
The Most Important Job in RVing
You've just had an incredible weekend getaway, maybe exploring the beautiful shores of Bear Lake or camping near the Wasatch Mountains. The adventure was perfect, but as you pack up, that one final task looms. It's time to deal with the tanks.
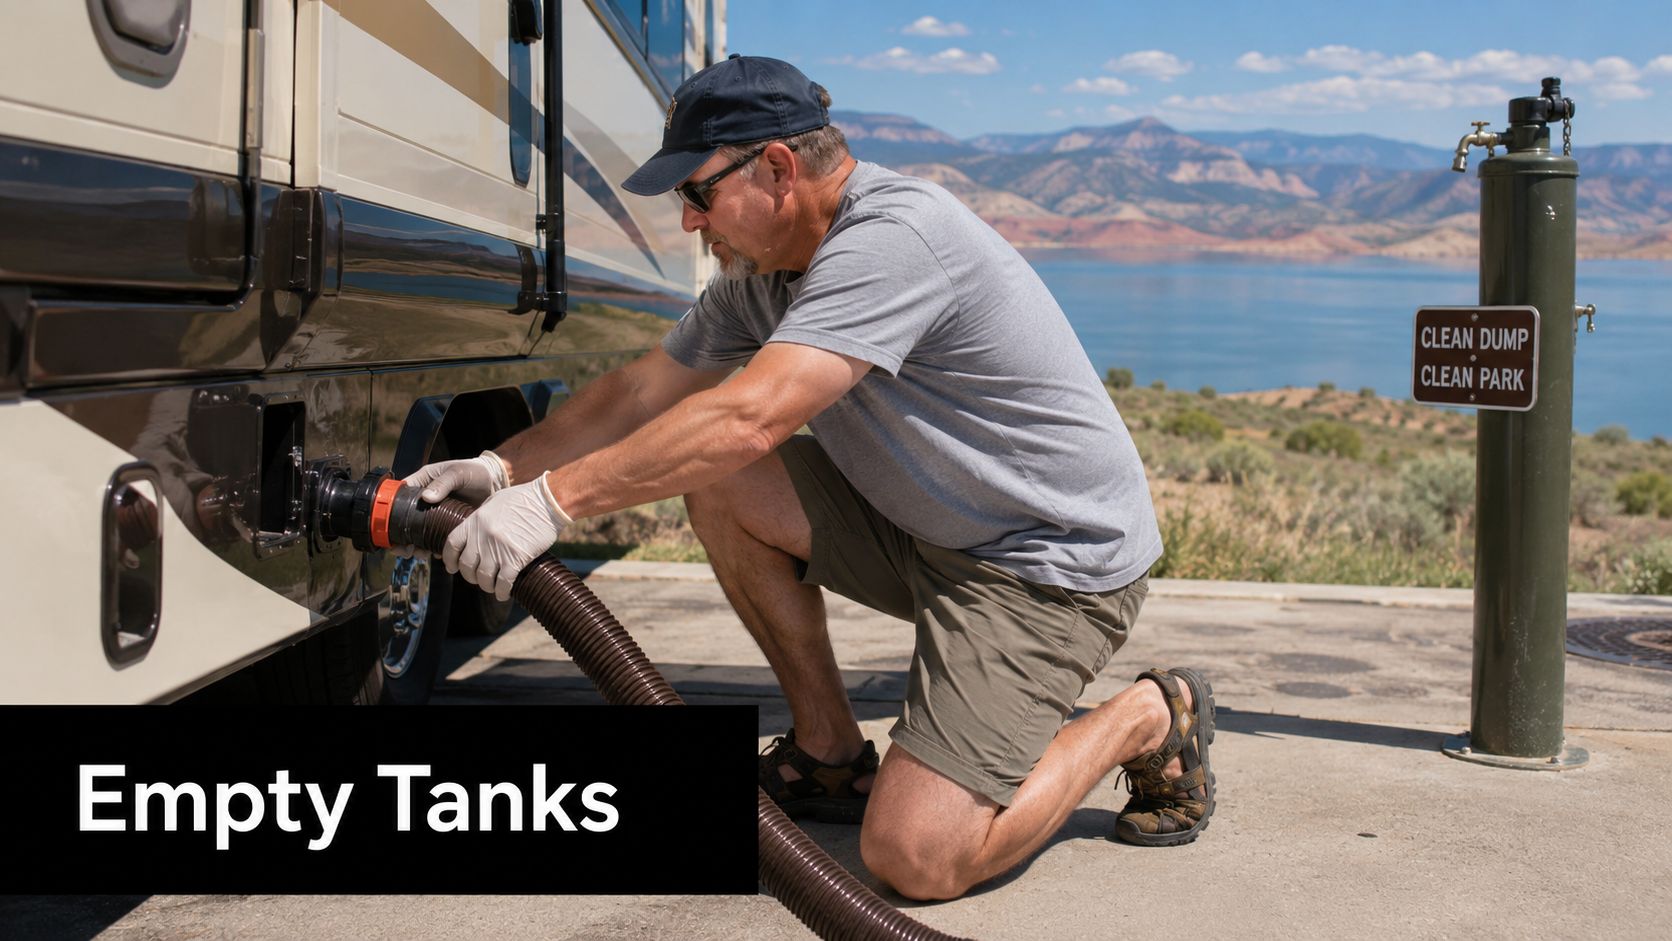
Look, nobody loves this part of RVing. But knowing how to handle RV waste disposal correctly is what separates a smooth trip from a messy, frustrating one. As the local RV experts here in Salt Lake City, we've seen it all—from first-timers feeling anxious to seasoned owners making simple, avoidable mistakes.
That's why our team at Motor Sportsland put this guide together. We're here to share our hands-on experience and give you the confidence to manage your tanks like a pro. We’ll walk you through everything, from the must-have gear to the step-by-step process, so you can finish the job cleanly, confidently, and get back to dreaming about your next Utah adventure.
Your Essential RV Waste Disposal Toolkit
Before you ever pull up to the dump station, you need to have the right tools on hand. This isn’t the most glamorous part of RVing, but gearing up properly is the difference between a quick, clean job and a messy, frustrating disaster. Let’s walk through the essential items our team at Motor Sportsland won’t leave home without.
First up, your sewer hose. Don't skimp here. The cheap, flimsy ones that often come with a new rig are prone to cracking and pinhole leaks—trust us, you don't want to find that out the hard way. Investing in a quality, heavy-duty hose is one of the smartest moves you can make. Another piece of gear we swear by is a clear elbow connector. It might sound a little gross, but it's the only way to actually see when the water is running clear and know your tank is truly empty and rinsed.
Our service team at Motor Sportsland always recommends starting with a 20-foot hose. It’s the perfect length to handle the different layouts you’ll encounter at dump stations, from sprawling state parks across Utah to tighter private campgrounds.
A few other items are just as crucial for a smooth and sanitary process:
- Disposable Gloves: This one’s a no-brainer. Always protect your hands. We recommend keeping a whole box in an outside storage compartment.
- A Dedicated "Dirty" Water Hose: Keep a separate hose just for rinsing your tanks and sewer connections. It should be a different color from your freshwater hose (never use your drinking water hose for this!) to avoid any dangerous mix-ups.
- Sewer Hose Supports: These simple plastic cradles create a nice, even downhill slope for your hose, ensuring everything flows out without leaving anything behind in the dips. They're a game-changer for getting a complete drain.
Putting together this small toolkit prevents huge headaches down the road. For more tips on keeping your system running fresh, take a look at our guide on choosing the right RV black tank treatment.
The Correct Process for Emptying Your Tanks
Alright, you've got your gear laid out, and you're ready to tackle the main event. Getting this process right is all about following the proper sequence. It's simple, but it makes all the difference between a clean job and a messy one.
The number one rule of RV dumping, which you should never, ever forget, is to always empty the black tank before the gray tank.
There's a very practical reason for this. The soapy water from your gray tank—from showers and sinks—acts as a chaser, flushing out any solids or lingering bits of toilet paper left in your sewer hose from the black tank. It's a built-in rinse cycle!
First things first, get a secure connection. Attach your sewer hose firmly to your RV's outlet and then connect the other end to the dump station's inlet. Once you're confident everything is locked in place, pull the valve for the black tank. You'll hear the unmistakable whoosh of the tank emptying.
Here's a little trick we've learned over the years: try to wait until your tanks are at least two-thirds full before you dump. That extra weight and volume create a much stronger flow, which does a far better job of clearing everything out in one go. If you're looking for more tips on using dump stations, you can read a 2026 guide for RV dumping stations.
Once the flow from the black tank stops, close that valve completely. Now, it's time to open the gray tank valve and let that water rush through, cleaning out your hose.
For those interested in upgrading their setup, tools like a macerator pump can make this process even easier by grinding waste and allowing you to pump it uphill. You can learn all about them in our other guide. Check out our guide on the macerator pump for your RV.
Finding Dump Stations and Understanding Costs in Utah
Knowing the right way to empty your tanks is one thing, but figuring out where you can actually do it is a whole other part of the puzzle. Luckily, if you’re traveling through Utah, you’ve got plenty of options for finding a legal and convenient dump station.
Your first and easiest option is usually right where you're staying. Most established campgrounds, including Utah State Parks like those at Jordanelle or Utah Lake, have dump stations on-site. These are often free for registered campers or available for a small fee if you're just passing through.
But what if you're not staying at a park with its own facilities? Many private RV parks will let you use their dump station for a drop-in fee. Major travel centers, such as Pilot or Flying J, are also great resources along Utah's highways, though it’s always a good idea to call ahead to confirm availability and hours.
Common Utah Dump Station Locations and Typical Costs
To help you plan your route and your budget, here’s a quick-reference guide to what you can generally expect to pay for RV waste disposal around Utah.
| Location Type | Typical Cost (as of 2026) | Notes for Utah RVers |
|---|---|---|
| Utah State Parks | Free for campers or up to $10 | Often the most scenic and well-maintained options. Included with your camping fee or a nominal charge. |
| Private RV Parks | $10 – $25 | A great option when you're on the move between destinations. Call ahead to confirm they accept non-guests. |
| Travel Centers (e.g., Pilot, Flying J) | $10 – $15 | Very convenient, as they are located along major highways. Some may offer a discount with a fuel purchase. |
| Municipal Facilities | Free to $15 | Some towns or water treatment plants offer public dump stations. Check city websites for availability. |
As you can see, the cost can range from free to around $25, so it’s wise to have a little cash or a card on hand. Having this local knowledge is especially crucial for longer trips or off-grid adventures. For more expert advice on boondocking, check out our guide on camping off the grid.
Why Proper RV Waste Disposal Is a Non-Negotiable Rule
Let's get serious for a moment. While the freedom of the open road is what RVing is all about, that freedom comes with a huge responsibility. It might seem tempting to empty your tanks in a quiet, remote spot, but illegal dumping is something you can never, ever do. That means no dumping into storm drains, on public lands, or simply on the side of the road.

This goes far beyond simple campground etiquette; it's about protecting the stunning natural landscapes we all love to explore. In Utah, raw sewage can easily find its way into precious waterways like the Jordan and Provo rivers, devastating local ecosystems and harming wildlife. Think about the scale of the problem: some reports have shown that illegal dumping from RVs can release over 1 million gallons of contaminated water into local waterways every single year. You can check out the full report on the public health hazard to see just how damaging it can be.
If you want a true picture of the worst-case scenario, just look at the intensive work involved in professional sewage damage cleanup in Los Angeles. It's a complex, hazardous process. Following the rules isn't just about avoiding a fine—it's about doing our part to ensure these beautiful places remain pristine for everyone to enjoy for years to come.
Your Partner on the Road to Clean and Confident RVing
At the end of the day, managing your RV's waste tanks is all about having a simple, repeatable process. It really boils down to having the right gear, following that crucial black-then-gray tank order, and knowing where to find legal dump stations in Utah. What might seem like a messy chore at first quickly becomes just another simple task on your travel checklist.
Our goal is to help you handle every aspect of RV ownership with confidence. Here at Motor Sportsland, we're more than just a dealership; think of us as your friendly, knowledgeable RV expert right here in the Salt Lake City area.
Whether you've hit a tricky plumbing snag that's beyond a simple fix or you're just curious to see the latest RVs with their incredibly user-friendly sanitation systems, our service center and showroom are ready to help.
We'd love for you to stop by our Salt Lake City showroom for a personalized consultation or browse our current inventory online and find the perfect home-on-wheels for your next great Utah adventure. When you're ready, stop by and say hello.
FAQ: Common RV Waste Disposal Questions
Spend a day at our Salt Lake City dealership, and you'll quickly learn the most common questions we get about RVs. Right at the top of the list? Waste tank worries. Let's clear the air on a few things our team gets asked all the time.
One of the biggest mistakes new RVers make is dumping their tanks too soon. It's tempting, but you need to resist the urge until your tanks are at least two-thirds full. This isn't just a random number—you need that volume of liquid to create enough force to flush everything out properly. A mostly empty tank just dribbles, leaving the solids behind.
"Can I just use my household toilet paper?" This is a hard no from our service team. Regular toilet paper is designed to stay strong when wet, which is the exact opposite of what you want inside your black tank. Always use RV-specific toilet paper that dissolves quickly. Using the wrong kind is the fastest way to create a clog. We have plenty of the right stuff in our parts store if you need it.
Finally, we hear this one constantly: "My sensors say the tank is full, but I know it's empty!" This is a classic RV problem we call "stuck sensors." Usually, it just means some toilet paper or residue is stuck to the sensor probes, giving you a false reading. A really thorough tank flush and cleaning often solves the problem right away.
If a deep clean doesn't do the trick, you might be looking at a more stubborn issue with the sensors themselves. When simple fixes don't work and you suspect a deeper problem, our team at Motor Sportsland can help, or you can seek out general RV diagnostic services to pinpoint the cause.
