
RV Black Tank Treatment: A Utah Owner's Guide
A lot of Utah RV trips start the same way. You get parked, crack the windows, put the camp chairs out, and then somebody flushes the toilet and the whole mood changes. Bad black tank odor can turn a clean trailer into a place nobody wants to sit in, and the confusing part is that plenty of owners already bought treatment pods, liquids, or powders and still have the problem.
That's the part most store shelves don't explain well. RV black tank treatment helps, but it isn't the main fix. In real use, the tank usually goes bad because of habits. Too little water. Valve left open too long. Dumping too early. Not flushing long enough. Those mistakes cause more trouble than picking the “wrong” bottle.
Utah campers run into this faster than they expect. Dry air, long summer trips, and shoulder-season cold snaps can all expose weak tank habits. What works best is simple, repeatable tank care. Good water management first. Treatment second. Deep cleaning when needed. That approach keeps odors down, reduces clogs, and gives your sensors a better chance of reading correctly.
Your Guide to a Fresher RV Adventure
A black tank problem rarely shows up at a convenient time. It happens when you're set up at Bear Lake, tucked into a campground near the Wasatch, or stopping overnight on the way south. The trailer looks great, the trip is going well, and then the bathroom starts smelling like the dump station.
Most owners respond the same way at first. They buy a stronger treatment. Then another one. Then a different scent, a different packet, or a different brand. Sometimes that helps for a bit. Sometimes it doesn't.
The hard truth is that many black tank issues start long before the odor shows up. Waste sticks because the tank was too dry. Residue stays behind because the tank got dumped too early. Sensors foul because solids and paper cling to the walls instead of washing out.
Practical rule: If you treat the black tank like a holding tank that needs water movement, it usually behaves. If you treat it like a magic box that one chemical can fix, it usually doesn't.
That's why experienced RV owners tend to become boring about their routine. They use enough water. They keep the valve closed. They flush the tank thoroughly. They use treatment as support, not as a miracle cure. That routine isn't flashy, but it's what keeps a bathroom usable on a real trip.
Choosing Your Black Tank Treatment Chemical vs Enzyme
Walk into any RV parts aisle and you'll usually see two broad categories. One is chemical treatment. The other is enzyme or probiotic treatment. Both can play a role in RV black tank treatment, but they do different jobs and come with trade-offs.
What each type is trying to do
Chemical products are generally aimed at fast odor control. They work more like a strong deodorizing and bacteria-killing approach. Owners often like them because they seem quick and direct.
Enzyme and probiotic products take a different path. They're intended to help break down waste and paper over time, and they're often chosen by owners who want a lower-chemical routine.
Neither category changes the basic rule that matters most. Multiple RV maintenance sources emphasize that water volume and usage habits matter more than additives, and even enzyme advocates still recommend a water base after dumping, a closed valve, and periodic deep cleaning, according to Simple Green's black tank treatment guidance.
| Feature | Chemical Treatments (e.g., Formaldehyde-based) | Enzyme/Probiotic Treatments |
|---|---|---|
| Primary goal | Fast odor suppression | Ongoing waste and paper breakdown support |
| Typical appeal | Quick response, strong deodorizing effect | Lower-chemical approach, often preferred for routine use |
| Main downside | Can be harsher in use and disposal considerations | Usually depends more on good conditions and good habits |
| Sensor help | Limited if residue is already stuck on sensors | Can help with buildup over time in some cases |
| Best use case | Owners who want immediate odor control | Owners building a maintenance routine around water and regular flushing |
| Reality check | Won't fix poor flushing habits | Won't fix poor flushing habits |
What actually works in the field
In practice, the “best” product is usually the one that fits your routine and dump habits. A family that uses plenty of flush water and dumps at the right time can get good results from several types of treatment. A family that skimps on water can make almost any treatment look bad.
That same principle applies beyond RVs. If you want a useful crossover read on holding tank odor control, Boat Juice has a practical article on how to stop boat holding tank odors that lines up with the same idea: process matters as much as product.
How to choose without overthinking it
A simple buying filter works well:
- If odor is your immediate complaint: A chemical treatment may feel more decisive.
- If you want a lower-chemical maintenance routine: Enzyme or probiotic products are often the first place owners look.
- If your tank already has buildup: Don't expect either one to erase a physical residue problem by itself.
- If you're just starting out: Pick one treatment style, use it consistently, and pair it with good water habits before changing products.
If you're comparing options for your own setup, it helps to browse actual RV cleaning products at Motor Sportsland so you can match the product form to how you camp, whether that's liquids, powders, or drop-ins.
The Right Way to Dose and Use Treatments
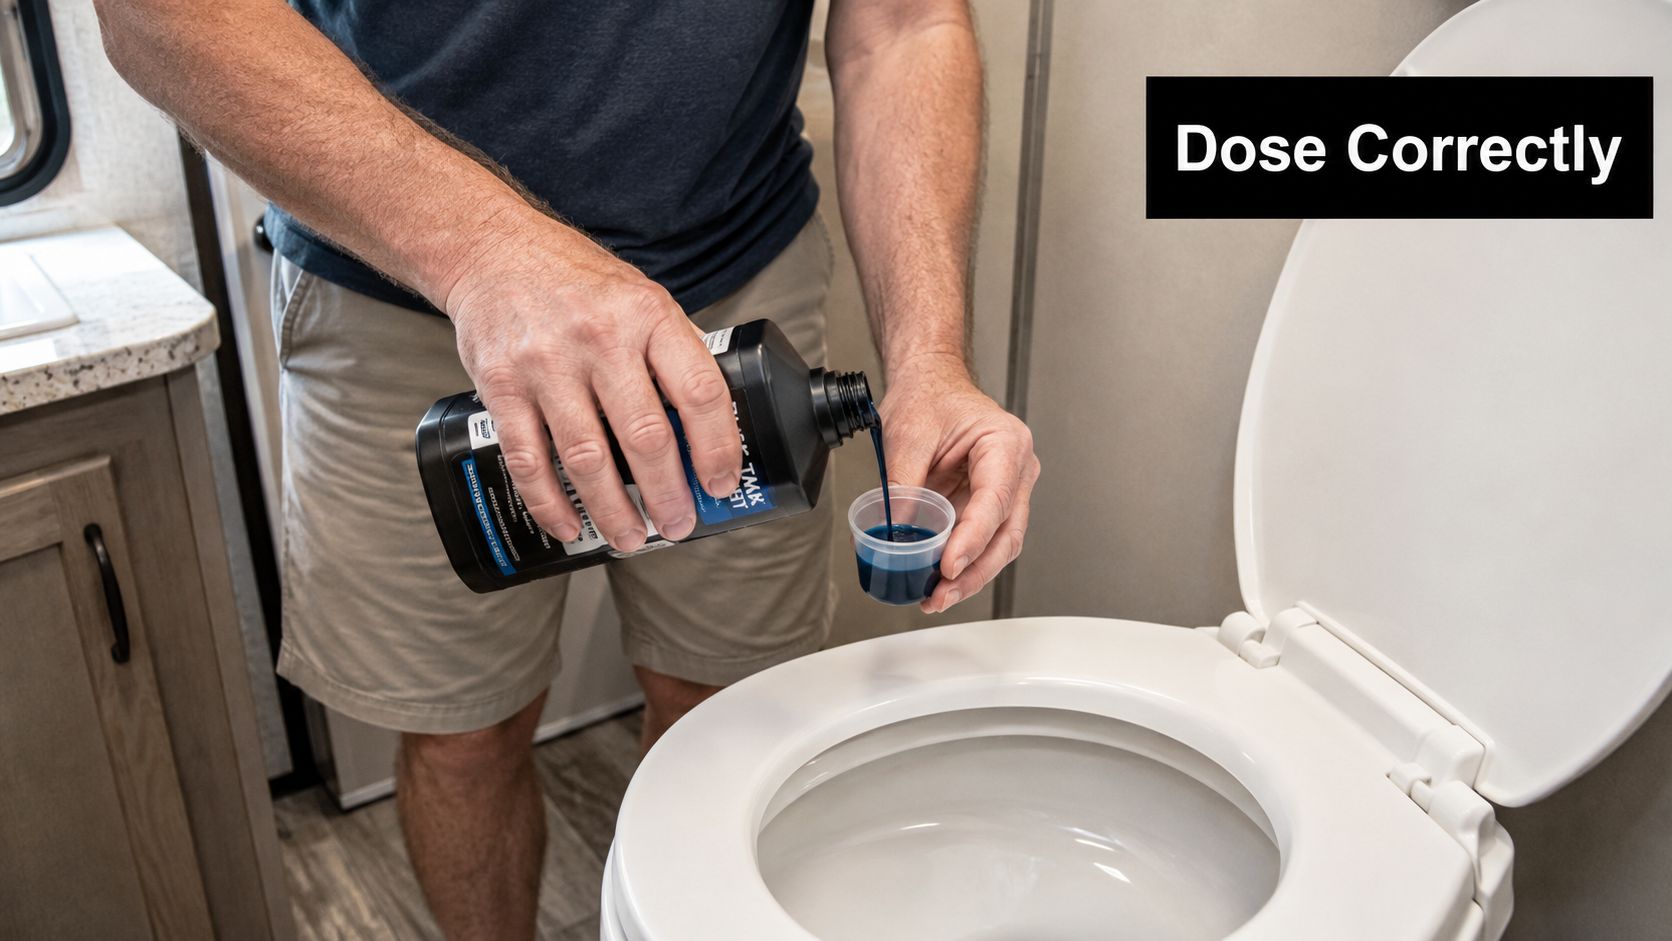
The biggest mistake with RV black tank treatment happens right after dumping. People empty the tank, toss in treatment, and assume they're done. That leaves the bottom of the tank too dry, which is exactly how waste starts sticking.
Prime the tank first
After the black tank is emptied and the valve is closed, add clean water back into the tank before you add treatment. Expert guidance suggests a starting target of at least 1 gallon after cleaning, or about 10% of tank capacity, with the example of 5 gallons in a 50-gallon tank, because the higher liquid volume improves solids suspension and drainage, according to Simple Green's RV black tank cleaning guide.
That water base matters more than most owners realize. It creates a wet landing zone for the next use, helps the treatment dissolve, and reduces the chance of solids drying onto the tank floor.
A simple dosing routine
Use this order every time:
- Dump the tank completely.
- Close the black tank valve.
- Add fresh water first. Aim for that starting base in the tank.
- Add your chosen treatment. Follow the package directions for the product itself.
- Use generous flush water during the trip.
If you use pods or drop-ins, they still need water to dissolve and move through the tank. If you use liquid treatment, it still performs better in a wet tank than a dry one. Powder products are no different.
Additives work best when they're supporting a wet, active tank. They work worst when they're asked to rescue a dry one.
Why dosing goes wrong
Most dosing mistakes come from one of these habits:
- Too little startup water: The tank bottom stays dry and catches solids.
- Treatment without mixing water: The product can't disperse properly.
- Using the toilet with short flushes: Waste doesn't move cleanly into the tank.
- Assuming stronger is always better: Overfocusing on chemical strength misses the bigger issue.
A visual walkthrough can help if you're more of a see-it-once kind of owner.
Best Practices for Daily Use and Odor Control
If you remember one rule, remember this one. Water is king. The treatment bottle is support gear. Your daily habits are the system.
A widely cited RV inspection guide says most black-tank problems are caused by insufficient water and recommends adding 3 to 5 gallons of water after dumping to create a base layer, then waiting to dump until the tank is 90% to 100% full so solids stay suspended instead of forming sludge, as explained in BJC RV's holding tank treatment guide.
The habits that prevent most problems
The owners who have the fewest black tank complaints usually do the same few things every trip:
- Start with water in the bowl: For solids, don't drop waste into a mostly dry path.
- Use a long flush: The goal is to move material all the way into the tank, not just past the toilet seal.
- Keep the black valve closed: An open valve lets liquids leave while solids stay behind.
- Wait to dump until the tank is full enough: Fuller tanks drain with better carry-out force.
That last point matters a lot at full-hookup sites. New owners often think leaving the black valve open is convenient. It usually creates the exact mess they're trying to avoid.
Utah camping makes dry tanks worse
Utah isn't kind to weak water habits. Dry air and warm weather can make a lightly used tank feel dry sooner, especially if the RV sits between dumps or if the family is trying to conserve water too aggressively. If you camp around the Great Salt Lake, the Wasatch Front, or the southern desert, that dry environment doesn't cause black tank issues by itself, but it exposes them fast.
Keep the valve closed and let the tank act like a holding tank. That's how you get a proper dump instead of a residue problem.
Toilet paper and “septic safe” confusion
A lot of owners also blame treatment when the actual issue is what they're putting into the tank. Anything that doesn't break down well can add to residue and sensor problems. That includes wipes, even when the packaging sounds reassuring. If you want a practical explanation of why “flushable” marketing can be misleading, WipesBlog has a helpful piece on septic-safe toilet paper and septic system behavior.
The tank doesn't need fancy rituals every day. It needs enough water, patient dumping habits, and realistic expectations.
Flushing Cleaning and Winterizing Your Tank
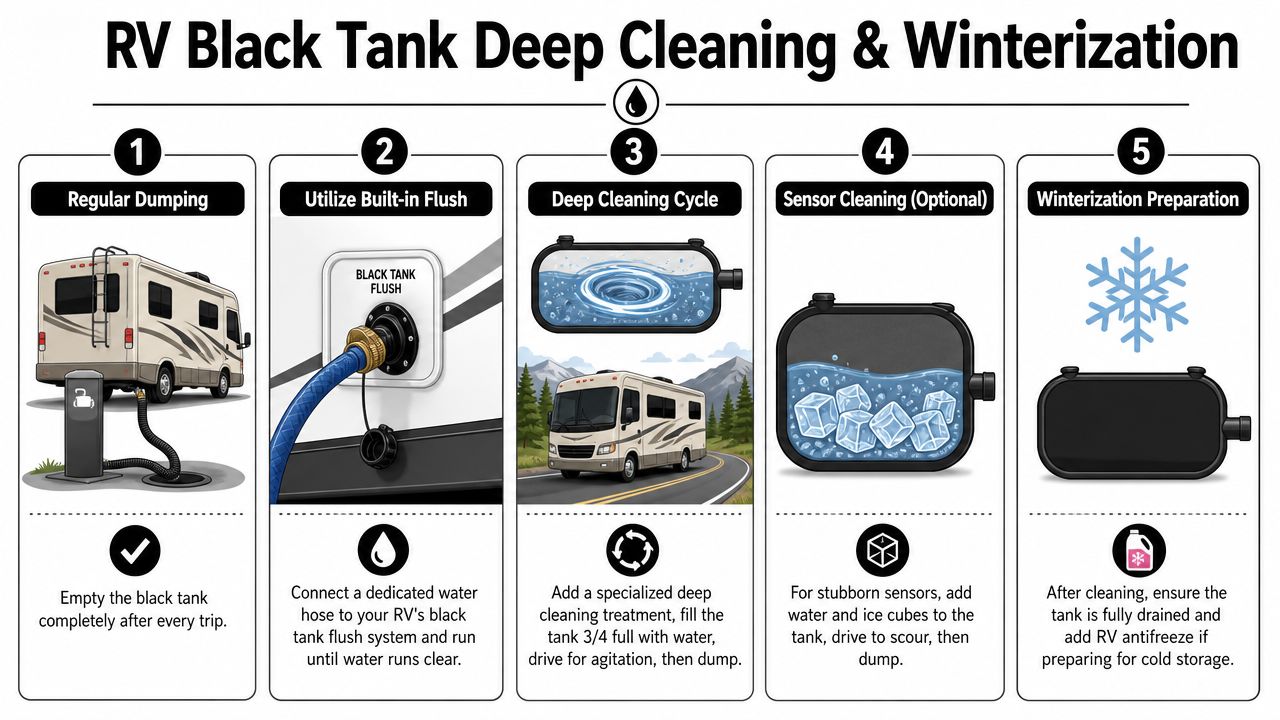
Regular dumping removes a lot. It doesn't remove everything. Tank walls, corners, and the area around sensors can still hold residue, especially after repeated short dumps or light-water use. That's where a proper flush routine earns its keep.
A better deep-clean method
One professional-style method is to run the tank-flush hose for about 15 to 20 minutes, then do repeated fill-and-drain cycles. Another walk-through recommends a closed-flush timer of about 10 minutes per fill cycle, repeated until the discharge runs clean, according to Changing Lanes RV's Kleen Tank process guide.
That gives you a clear field routine:
- Hook up the sewer connection securely
- Empty the black tank first
- Close the valve
- Run the flush system long enough to build water volume
- Drain again
- Repeat until what comes out is mostly clear
That extra rinse cycle is often what separates a tank that merely empties from a tank that gets cleaner.
Built-in flush systems and macerators
If your RV has a built-in black tank flush, use it. If your setup includes special waste equipment, it also helps to understand how the rest of the system moves material out. Owners comparing dump setups can learn a lot from this macerator pump RV overview from Motor Sportsland, especially if they camp in places where dump logistics are tight.
Getting ready for a Utah winter
Cold-weather storage adds another layer. Before winterizing, get the tank as empty and clean as possible. Residue left in the system can harden, smell worse in spring, or create service headaches when the RV comes back out.
A practical cold-season routine looks like this:
- Give the tank a final full dump
- Flush it thoroughly
- Make sure the valve area is drained
- Protect the system with RV-safe winterizing products where appropriate
- Don't forget the toilet seal
A clean tank put away for winter is much easier to bring back into service than a dirty one left to sit in freezing weather.
The key isn't perfection. It's avoiding long-term buildup before the RV sits.
Troubleshooting Common Black Tank Nightmares
Even owners with decent habits run into three complaints over and over. Persistent odor. False full readings. Clogs. They're related more often than people think.
Why sensors lie
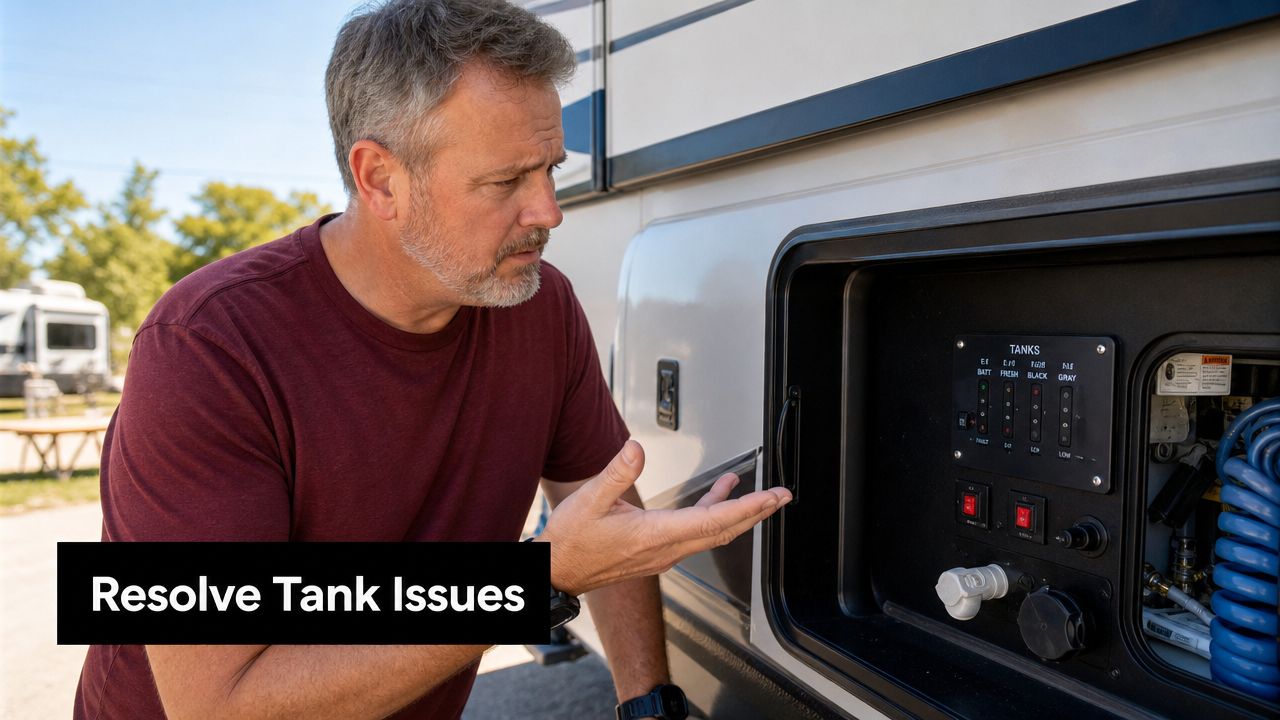
A false “full” reading usually doesn't mean the monitor panel is broken. It often means waste or paper is stuck to the sensor area. One review-style source notes that enzyme treatments can help with sensor misreading, but they're not a cure-all. The same source says stubborn buildup may call for professional hydro-jet cleaning every 2 to 3 years because high-pressure water can remove residue that ordinary treatment and flushing can't, according to Unique Camping + Marine's black tank treatment review.
That's why a bad sensor reading and a lingering odor often show up together. The tank isn't just “smelly.” It's dirty.
When a clog is still a DIY job
If the toilet won't clear properly, start with the likely cause. A clog near the toilet opening or a small waste mound can sometimes be improved with more water in the tank and a better rinse routine. Some owners also use agitation methods during travel to loosen material before dumping again.
DIY effort makes sense when:
- The issue is recent: You know the clog started on this trip.
- The tank hasn't had chronic odor problems: That points to a fresh blockage, not years of residue.
- The monitor issues are occasional: Not constant.
When treatment won't solve it
Treatment won't remove hardened buildup by itself. If the tank has repeated odor after dumping, if sensors stay wrong trip after trip, or if drainage is poor no matter what product you use, you're past the point where another bottle is likely to help.
That's when a professional cleaning makes sense. Some rigs also end up needing related repair work around the toilet, seals, or surrounding bathroom components. If the issue turns out to involve fixtures or interior wear, this RV bathroom renovation resource from Motor Sportsland gives a useful look at what can be updated when wear and plumbing issues overlap.
If the same black tank problem keeps coming back, stop changing products and start looking for residue, venting, or mechanical issues.
Conclusion Your Partner in RV Care
Good RV black tank treatment starts with a simple mindset. Water first. Product second. That one shift solves more tank trouble than endlessly swapping from one chemical to another.
The most dependable routine is also the least glamorous. Start with water in the tank after dumping. Use enough water with every flush. Keep the valve closed until it's time to dump. Flush the tank thoroughly when you empty it. Deep clean it when normal dumping stops being enough.
That approach matters even more for Utah owners dealing with dry camping conditions, mountain travel, changing seasons, and winter storage. Black tanks don't need mystery. They need consistency.
If your RV still smells bad after a proper routine, if the sensors never read right, or if you're tired of fighting the same clog, it's worth getting experienced eyes on it. And if you're shopping for a trailer or motorhome and want a setup that fits how your family camps, looking closely at tank access, plumbing layout, and serviceability can save headaches later.
Frequently Asked Questions About Black Tank Care
Do I need RV black tank treatment every time I dump
Treatment is helpful as part of a routine, but it's not a replacement for good water habits. The tank performs best when it starts wet, stays wet enough during use, and gets flushed properly.
Is enzyme treatment always better than chemical treatment
Not always. Enzyme and probiotic products appeal to many owners because they fit a lower-chemical approach, but chemical products may feel more effective for immediate odor control. The better choice depends on your camping style and whether your daily habits are solid.
Why does my black tank smell right after I dumped it
That usually points to leftover residue, poor flushing, venting issues, or a tank that hasn't been getting enough water during use. A dump alone doesn't guarantee the tank walls are clean.
Should I leave the black tank valve open at a full-hookup site
No. That habit commonly lets liquids drain away while solids remain behind. Keeping the valve closed helps the tank hold enough liquid for a stronger dump.
Why do my sensors say full when the tank is not
Sensors often foul when waste or paper sticks to them. That's a buildup problem, not always an electrical one. Treatment may help somewhat, but stubborn residue often needs a stronger cleaning approach.
How often should I deep clean the tank
It depends on how heavily the RV is used and how good your normal dumping routine is. If odors linger, sensors stay inaccurate, or the tank doesn't drain cleanly, it's time for more than a quick rinse.
What's the biggest mistake new RV owners make
The short answer is not using enough water. That one habit leads to odor, clogs, sludge, and bad sensor readings more than anything else.
If you'd like help choosing the right RV, scheduling service, or getting your current rig road-ready, Motor Sportsland is a great place to start. You can browse inventory online, explore service resources, or connect with a local Utah team that knows how RVs really get used in this climate.
