
Master RV Plumbing System Basics: A Utah RVer’s Complete Guide for 2026

When you're new to RVing, the plumbing system can seem like a total mystery. All those tanks, hoses, and valves can be intimidating, but we promise it's much simpler than it looks. Here at Motor Sportsland, it's one of the first things our team walks new owners through at our Salt Lake City showroom, because once you understand the basics of an RV plumbing system, you can hit the road feeling confident and prepared for your first Utah adventure.
Imagine you're packing for a weekend trip to Bear Lake. Your RV’s plumbing is like a self-contained loop designed to bring all the comforts of home with you. It’s a system built to bring clean water in, get it to your faucets and shower, and then safely hold the used water until you can dispose of it properly. Getting this right is the key to a stress-free trip, and we're here to help you become a pro.
The Three Core Components of RV Plumbing
At its heart, every modern RV plumbing system is divided into three distinct parts. Keeping them straight is the key to understanding how it all works.
- Freshwater System: This is your supply of clean, potable water. It feeds your kitchen sink, bathroom faucet, and shower, giving you all the essentials for drinking, cooking, and washing up.
- Gray Water System: This system collects the "gently used" water from your sinks and shower. All that soapy water has to go somewhere, and the gray tank keeps it neatly separated from everything else.
- Black Water System: This one has a single, important job: handling waste from the toilet. Keeping this waste isolated is absolutely critical for sanitation and proper, safe disposal.
This diagram gives you a great visual of how these three systems are designed to work together, yet stay completely separate.
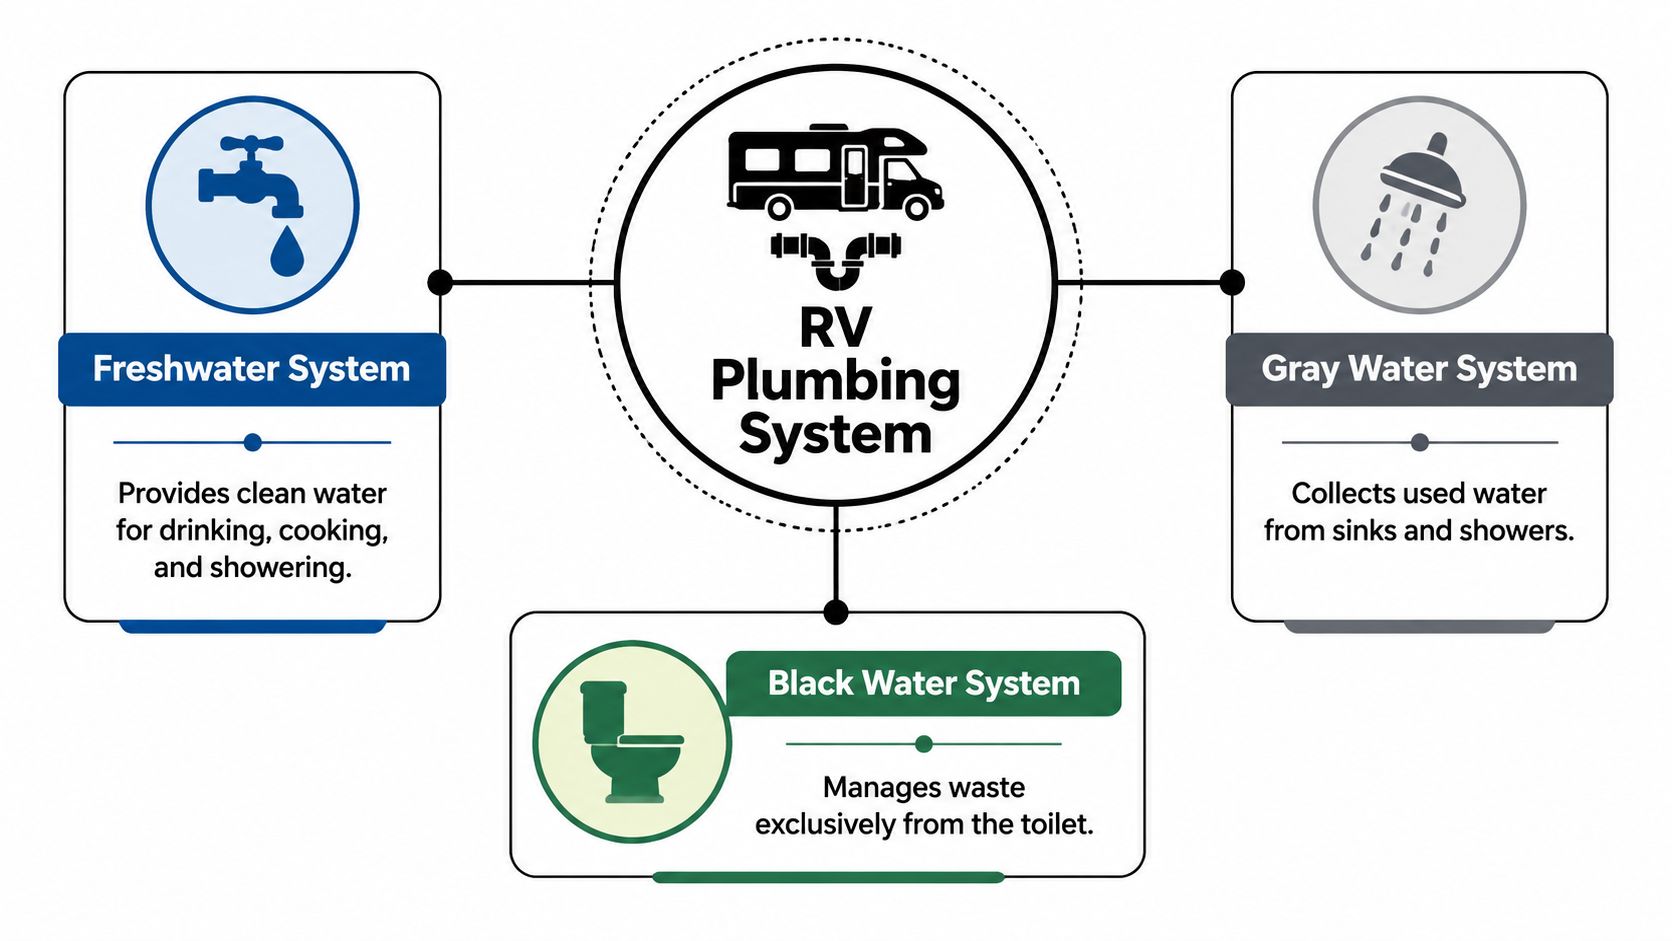
As you can see, each system has its own tank and its own purpose. This separation is what prevents cross-contamination and keeps the whole process clean and simple. Once you grasp this fundamental concept—fresh in, gray out, black out—you've unlocked the secret to your RV's plumbing. You're ready to head out on that first adventure, knowing exactly how your water gets in, gets used, and gets out.
Understanding Your Freshwater System
Let's dive into one of the most important systems in your RV: the freshwater system. This is what gives you clean, safe water for drinking, cooking, and washing up, no matter where your adventure takes you.
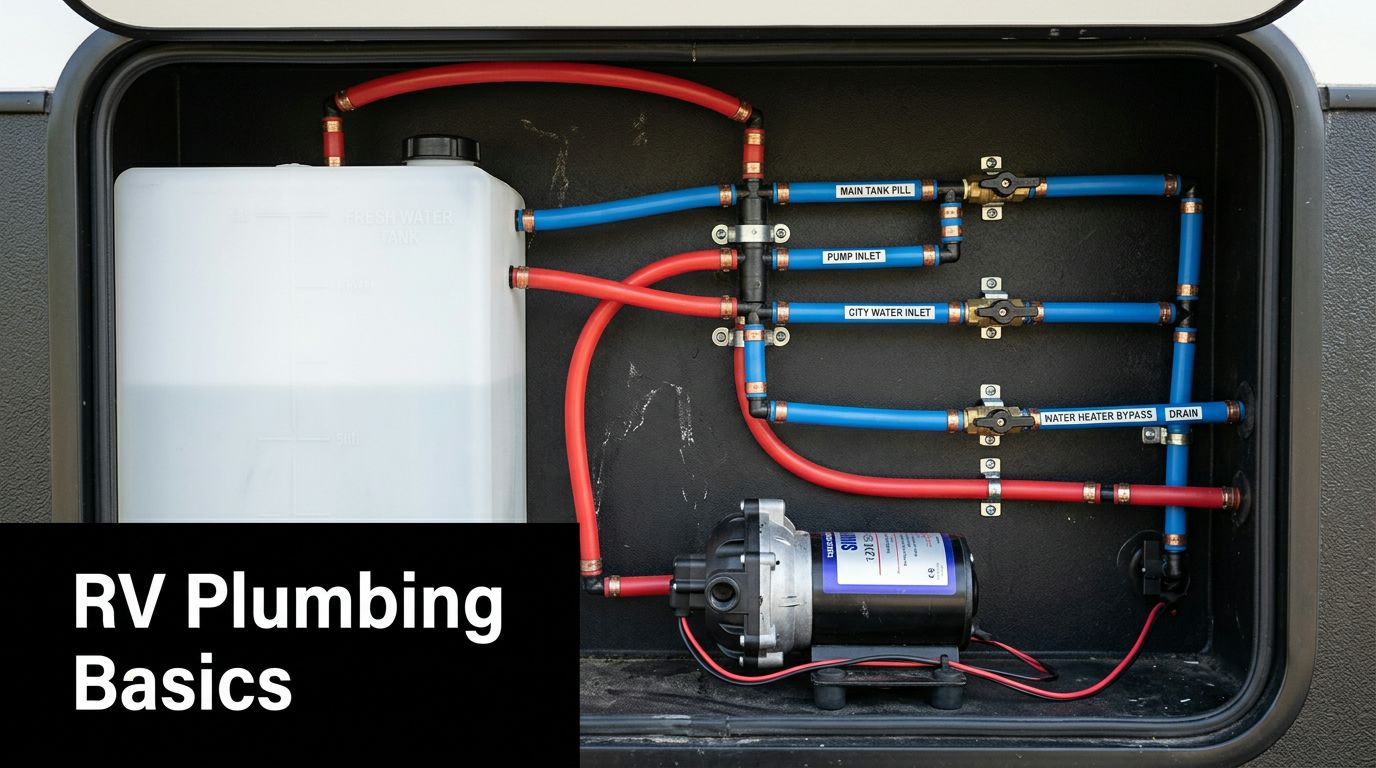
Your rig essentially has two ways to get water to the faucet. You can either tap into the water stored in your onboard freshwater tank or, if you're at a developed campground like Jordanelle State Park, connect directly to the spigot—a method we call a "city water" hookup.
Using your onboard tank is the key to true freedom. It's what makes boondocking possible, whether you're parked in a remote corner of the Wasatch Mountains or just overnighting in a parking lot. This setup uses a 12-volt water pump to create pressure. When you turn on a faucet, the pump senses the drop in pressure and automatically kicks on, sending water from your tank right where you need it.
Your Two Water Sources Explained
Freshwater tanks in most modern RVs hold anywhere from 20 to 100 gallons, which is usually more than enough for a weekend trip. But when you pull into a campsite with full hookups, connecting to the city water supply is a game-changer. It gives you a constant, steady stream of pressurized water without you having to touch your pump or worry about running your tank dry.
A Quick Tip from Our Service Team: We always recommend keeping at least a few gallons of water in your freshwater tank, even when you're on a city water connection. It's a great backup if the campground’s water unexpectedly shuts off, and it's perfect for flushing the toilet during a travel day.
Essential Gear for Safe Water Connections
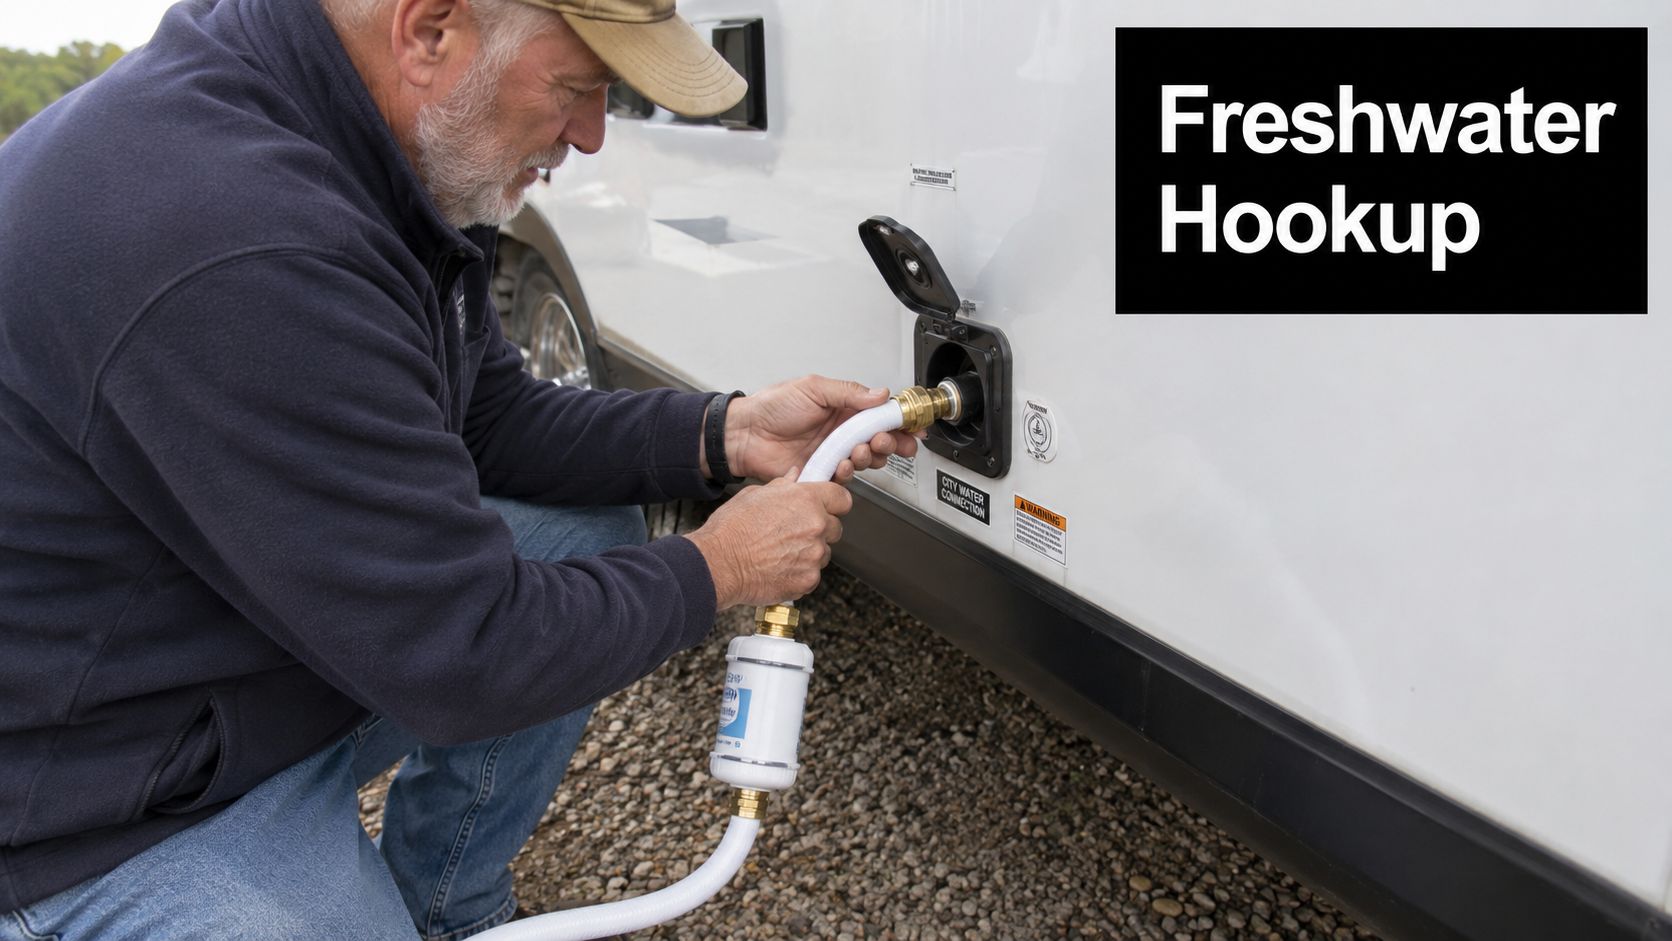
Whether you’re filling up your tank or hooking up at a campsite, using the right gear isn't just a good idea—it's essential for protecting your RV's plumbing. There are two pieces of equipment that every single RVer should have, no exceptions.
- Potable Water Hose: Always use a dedicated drinking water hose, which is typically white or blue. Never, ever use a standard green garden hose for your fresh water. Those can leach chemicals into your water, leaving a nasty plastic taste and potentially making it unsafe. Today, more than 70% of RV owners own at least one potable-water hose made from food-grade materials, a huge improvement in safety over the past couple of decades.
- Water Pressure Regulator: This little brass fitting is your RV's best friend. Campground water pressure can be all over the place, and a sudden surge of high pressure can blow out your lines, fittings, and even appliances. RV plumbing is designed for pressure between 40–60 psi. Anything higher is a recipe for disaster. Our service team here in Salt Lake City sees costly damage from unregulated water pressure all the time.
Ready to find your perfect RV with a plumbing system that fits your travel style? Browse our current inventory at motorsportsland.com or stop by our showroom for a personalized consultation.
Managing Your Gray and Black Water Tanks
Alright, let's get into the less glamorous—but absolutely essential—side of RV life: managing the wastewater. Once you've used the water from your freshwater tank for showers, dishes, or the toilet, it has to go somewhere. Your RV cleverly separates this into two different holding tanks: the gray tank and the black tank.
Think of the gray tank as the destination for all your relatively clean wastewater from sinks and the shower. The black tank, on the other hand, is dedicated solely to waste from the toilet. Keeping them separate is the key to a sanitary and manageable system.
Gray vs. Black Tanks: What's the Difference?
Your RV’s holding tanks can hold anywhere from 15 to 50 gallons each, depending on the size of your rig. You’ll have a sensor panel inside that gives you a rough reading of how full they are. It’s a great habit to check those levels every day, especially when you’re camping without a sewer hookup (“boondocking”).
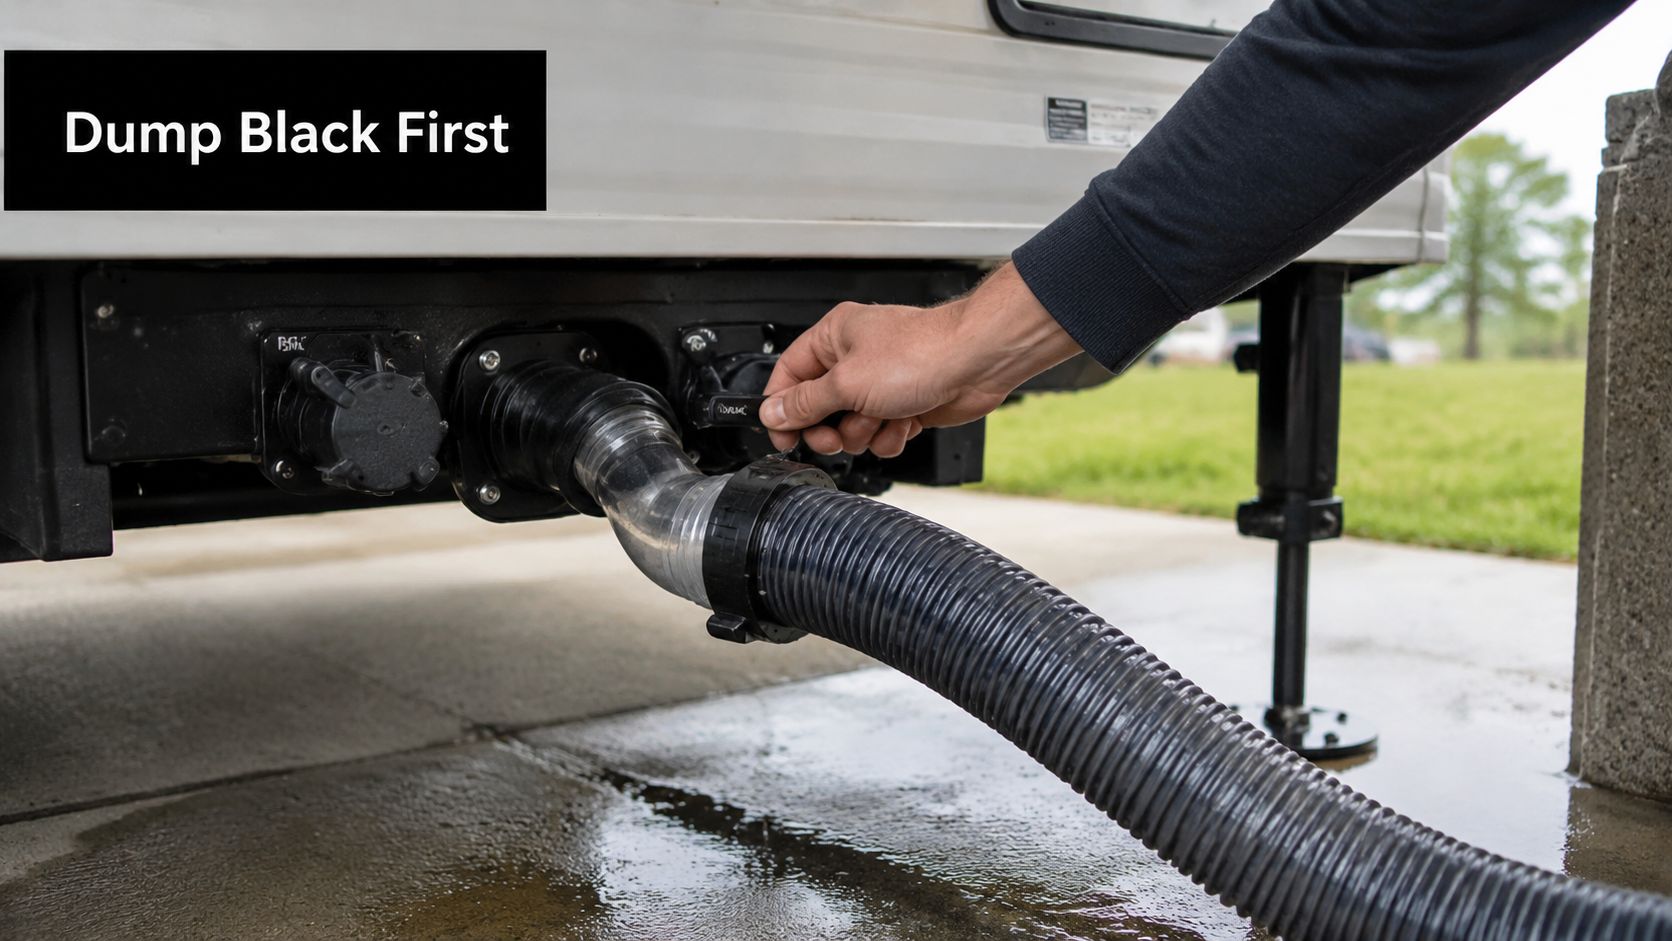
The most intimidating task for any new RVer is often emptying these tanks at a dump station. We see it all the time with folks new to RVing—there's a lot of anxiety around the process, but I promise it's straightforward once you’ve done it a couple of times.
The Golden Rule of Dumping Tanks: Our service team's number one piece of advice is to always dump the black tank first, then the gray tank. Why? Following this order lets the soapy water from your gray tank flush out the sewer hose, keeping it much cleaner in the long run.
This two-tank system is the industry standard now, with about 95% of modern motorhomes and travel trailers featuring separate tanks. So, mastering this process is a universal skill you'll use at just about every RV park and dump station.
To help you keep things straight, here’s a quick-reference guide for your RV’s holding tanks.
RV Holding Tank Quick Reference Guide
| Tank Type | What It Holds | Key Maintenance Tip |
|---|---|---|
| Gray Tank | Water from sinks and the shower. | Dump this tank after the black tank to help rinse your sewer hose. |
| Black Tank | Waste from the toilet only. | Always use RV-specific toilet paper and a quality tank treatment. |
Keeping these simple points in mind will save you a lot of headaches down the road.
Preventing Clogs and Odors
Proper tank management is about more than just emptying them; it’s about being mindful of what goes into them in the first place. For a healthy, odor-free black tank, there are two non-negotiables.
- RV-Specific Toilet Paper: This isn't a sales gimmick. This paper is specially designed to dissolve quickly. Regular household toilet paper is too thick and is the number one cause of clogs our service department has to fix. Trust us, a clogged black tank is a nightmare you want to avoid at all costs.
- Tank Treatments: Using a good enzymatic or chemical tank treatment is a must. It works to break down solid waste and paper, all while keeping unpleasant odors under control. For help picking the right product, check out our guide on how to choose and use the best RV black tank treatments.
Essential Maintenance to Prevent Plumbing Headaches
A little bit of preventative care goes a long way in keeping your RV’s plumbing system happy and headache-free. It’s no different than getting the oil changed in your truck—these simple, routine checks are what stand between you and a trip-ruining disaster. Here at Motor Sportsland, our service team has seen just about every plumbing problem imaginable, and trust me, most of them could have been avoided with a little bit of attention.
Your RV plumbing is an entire network of pipes and fittings, and every single connection is a potential weak spot. Before you head out on a big trip, and at least once a month during camping season, take five minutes to do a quick visual check. Look under the sinks, get a peek behind the toilet, and check the areas around your water pump and water heater. If you see any drips, discoloration, or crusty mineral buildup, you’ve caught a small problem before it can cause serious water damage.
Seasonal Plumbing Care Checklist
Just as you’d get your yard ready for spring, your RV’s water system needs a little seasonal love to ensure the water is safe and the system is reliable. These steps aren't complicated, but they are absolutely essential.
- Sanitize Your Freshwater System: This is a must-do at the start of every season. It’s the only way to kill off any mold or bacteria that might have set up camp in your tank and water lines while your rig was in storage. You can use a simple, diluted bleach solution or grab a sanitizer made specifically for RVs. The whole process only takes a few hours.
- Check Your Anode Rod: If you have a traditional tank-style water heater, there’s a small part inside called a "sacrificial" anode rod. Its job is to attract corrosive minerals in the water, sacrificing itself to protect the heater tank. Check it once a year. If it looks like it's been mostly eaten away, replace it. It's a very inexpensive part that protects a very expensive appliance.
- Inspect Seals and Gaskets: The blade seals on your gray and black tank dump valves, along with the rubber gasket in your toilet bowl, can dry out over time. A quick application of plumber’s grease keeps them lubricated, pliable, and, most importantly, ensures a perfect seal.
Non-Negotiable Winterization for Utah Campers
For any RVer in Utah or other cold climates, let’s be crystal clear: winterizing your plumbing is not optional. The moment temperatures dip below freezing, any water in your pipes will expand with incredible force. That expansion can easily crack fittings, split water lines, and destroy your water heater. Every spring, our Salt Lake City service center sees a parade of rigs with costly, preventable freeze damage.
Winterizing is the process of completely draining all the water from your tanks and lines, then pumping non-toxic RV antifreeze through the entire system. This pink fluid displaces any remaining water and ensures that every single component, from the faucet to the toilet valve, is protected from cracking over the winter. This same principle of safeguarding your pipes from excessive pressure applies in many situations; for example, protecting your home plumbing often involves similar preventative measures against different kinds of pressure issues.
A common frustration we hear about from customers is when tank sensors give false "full" readings right after being emptied. A great pro tip from our team is to add a few gallons of fresh water and a dose of tank-cleaning treatment back into your tanks after you dump. The sloshing motion as you drive to your next spot helps scrub the sensors clean, keeping them accurate.
Troubleshooting Common RV Plumbing Problems
Even the most well-maintained RV can throw you a curveball on the road. But don't let a minor plumbing hiccup put a damper on your adventure! Before you pick up the phone, let's walk through a few common issues that you can often fix yourself with a little bit of know-how.
The secret is to always start with the simplest solution first. You’d be surprised how often our service team can talk a customer through a fix over the phone in under a minute.
My Water Pump Won’t Turn On
Your 12-volt water pump is the heart of your plumbing system when you're not hooked up to city water, so it's a big deal when it suddenly goes quiet. More often than not, the fix is refreshingly simple.
- Check the Switches: It sounds almost too obvious, but have you checked the pump switch? We’ve all been there. Make sure the main switch on your control panel is on, and don't forget about any secondary switches you might have in the kitchen or bathroom.
- Confirm Your Power: The pump runs on your 12V battery system. Is your battery disconnect switch in the "on" position? Are your house batteries charged? A dead battery means a dead pump.
- Inspect Fuses and Water Level: Pop open your 12V fuse panel and look for a blown fuse, usually labeled "water pump." While you're at it, double-check that you actually have water in your freshwater tank. Many pumps have a safety feature that prevents them from running dry.
My Faucet Is Sputtering
A faucet that sputters and spits is almost always just a case of air getting trapped in the water lines. This happens all the time after you de-winterize your rig or if you've run the freshwater tank completely empty.
Luckily, the fix is easy. Just go to the faucet that's farthest from your water pump and open both the hot and cold taps. Let the water run until all the sputtering stops and you have a steady, solid stream. This purges all the trapped air right out of the system.
A Quick Troubleshooting Tip: If you spot a leak, don't panic. For a small pinhole leak, a bit of rescue tape can often provide a temporary patch until you can get a permanent repair. When the unexpected happens, having a plan for emergency plumbing help for leaks is incredibly useful.
My Water Heater Won't Light
A cold shower is nobody's idea of a good time while camping. If your propane water heater refuses to fire up, run through this quick mental checklist.
- Got Gas? First, make sure your propane tanks are actually turned on and have fuel in them. A simple way to check is to light a burner on your stove; if it lights, you know gas is flowing to your appliances.
- Air in the Lines: If you just swapped out a propane tank, you might have some air in the gas line. Try cycling the water heater switch on and off a few times, waiting about a minute between each attempt. This helps purge the air and allows the gas to reach the igniter.
- Look for Blockages: Spiders and other insects are notorious for building nests inside the burner tube, which blocks the flow of gas. Carefully check the tube for any webs or debris and gently clean it out.
If you’ve gone through these steps and are still stuck with a stubborn plumbing problem, it might be time to call in the pros. Some jobs are best left to an expert, and our service team at Motor Sportsland is always ready to get you back on the road safely.
How Modern RV Plumbing Makes Life on the Road Easier
To really appreciate the convenience of your rig’s water system, it helps to look back at just how far things have come. Early RVs had some pretty primitive setups—think a simple water jug and a hand pump. Today's systems, however, are engineered for reliability and comfort, turning your RV into a true home on wheels.
A huge leap forward happened back in the 1970s. RV makers ditched the heavy, rigid metal pipes you have in your house and started using lightweight, flexible PEX tubing. This was a game-changer. PEX could handle the constant vibrations of the road without cracking, making the whole system far more durable for a life in motion.
The Evolution of Self-Contained Travel
What truly defines a modern RV is its ability to be completely self-contained. The standardized three-tank system—fresh, gray, and black—became the norm, allowing campers to venture off-grid for days at a time. It’s no surprise that 85–90% of new RVs sold today feature this onboard configuration.
This setup is designed specifically for the unique demands of an RV. The entire system operates at a much lower pressure, typically 40–60 psi, than your home's water supply. If you're curious about the nitty-gritty details, you can explore the differences between RV and home plumbing to see just how specialized these systems are.
Here at Motor Sportsland, our team always tells people that these modern systems are the secret to true freedom on the road. Everything from the 12-volt water pump to the flexible tubing is designed to give you a hot shower and clean dishes, even when you're exploring the remote corners of Utah. It's that reliable, self-contained design that makes the whole lifestyle possible.
Of course, being self-contained means you also have to manage waste. This has led to some fantastic innovations that make emptying your tanks cleaner and easier than ever. Some RVers even upgrade their rigs with powerful tools to make the process completely hassle-free. If you're interested in one of the most popular upgrades, check out our guide on how an RV macerator pump works.
Your Top RV Plumbing System Questions Answered
Even with a solid grasp of the basics, a few questions always pop up when you're getting used to an RV's plumbing. And that's completely okay! We've heard just about all of them over the years from customers, so we’ve gathered the most common ones we hear from fellow Utah RVers right here in our Salt Lake City showroom.
How often should I sanitize my RV's freshwater system?
A good rule of thumb is to sanitize your entire freshwater system at least twice a year. Your first go-around should always be when you're de-winterizing the rig for the spring camping season. Our team also recommends doing it again about halfway through the summer, especially if you're using the RV a lot or camping in high-altitude areas where water quality can vary. It’s a simple job—just run a diluted bleach solution or a specialized RV cleaner through the tank and lines. This quick task zaps any bacteria that might be hanging around, keeping your water safe and tasting fresh.
Can I use regular toilet paper in my RV?
This is a huge one, and the answer from our service department is a hard no. You absolutely have to use toilet paper made specifically for RVs or marine use, which is designed to dissolve very quickly. Regular household toilet paper is made to stay strong, which is the last thing you want inside a black tank. It can easily cause clogs in your tank, sensors, and even the sewer hose. Trust us, that's a problem that can bring a great camping trip to a screeching, messy halt. Spending a little extra on the right paper is cheap insurance.
What's the most critical piece of plumbing gear I need?
The single most critical plumbing accessory every RVer needs is a water pressure regulator. Water pressure at campgrounds can be all over the place, sometimes surging well over 60 psi. That kind of force can blow out your water lines and fixtures in an instant. It's the best and cheapest insurance you can possibly buy for your RV's plumbing.
Why is my water pump running all the time?
If your 12V water pump keeps kicking on and off even when all the faucets are closed, the system is losing pressure somewhere. More often than not, the culprit is a leak. Your first step is to play detective. Carefully check every single water line fitting, the connections under your sinks, and the toilet for any sign of a drip. It doesn't take much—even a very slow, tiny leak is enough to make the pump cycle. If a thorough search turns up nothing, the issue might be an internal failure in the pump's pressure switch. If you suspect that's the case, it might be time to have it looked at by our service center here at Motor Sportsland.
Ready to Master Your RV?
Understanding your RV plumbing system basics is a huge step toward becoming a confident RVer. It takes the mystery out of your rig and empowers you to handle the small stuff on your own, so you can focus on enjoying the incredible Utah scenery.
If you have more questions or want to see these systems in person, stop by our showroom at [your address in SLC]. Our friendly team is always here to help you make better decisions and find the perfect RV for your adventures. You can also browse our latest inventory on motorsportsland.com or schedule a service appointment to get your plumbing checked by the pros.
