
Your Ultimate Guide to RV Door Repair for Utah Adventures in 2026
You pull into your favorite spot at Jordanelle State Park, ready to kick back and enjoy the Utah mountain air. You go to open your RV door and… scrape. It sticks. Or maybe it’s a loose latch that won't catch, leaving you feeling insecure at night. There's nothing like a stubborn RV door to put a damper on your adventure. It feels like a major problem, but here at Motor Sportsland, our service team can tell you firsthand that most common issues—like sticking, drafts, or a fussy lock—are things you can often diagnose and fix yourself with just a few basic tools and a little know-how.
This guide is built on the real-world experience of our service technicians right here in Salt Lake City. We'll walk you through the same steps we use to diagnose problems, from simple alignment tweaks to replacing worn-out seals. We’ll show you which jobs are perfect for a DIY afternoon and which are red flags that mean it's time to call in a professional. Let’s get that door swinging smoothly so you can get back to enjoying your RV.
Diagnosing Common RV Door Problems
It doesn't matter if you’re setting up at a campsite near Bear Lake or parked in your driveway in Salt Lake City; a door that won’t open, close, or lock properly is a trip-stopper. Before you assume the worst, you need to play detective.
Here at the Motor Sportsland service center, we see these issues every single day. A proper diagnosis is the key to saving time, money, and frustration. Believe it or not, many repairs that seem complicated are surprisingly simple, much like the ones we detail in our guide to pop-up trailer repairs.
Our Team's Tip: Always start with the simplest explanation first. Your RV shifts and settles every time you travel and level it. That door problem that seemingly appeared overnight might just be a minor alignment issue caused by the RV settling at your new campsite.
To help you get started, we've put together a quick chart based on the problems we see most often. Use this to match your door’s symptom to its likely cause and figure out your next step.
Quick DIY Repair Diagnostic Chart
| Symptom | Likely Cause | DIY Difficulty | First Step |
|---|---|---|---|
| Door sticks or scrapes the frame | RV has settled, causing frame misalignment | Low to Medium | Check the door's alignment and adjust the striker plate. |
| You feel a draft or see daylight | Worn-out or compressed weatherstripping | Low | Visually inspect seals for cracks and perform a "dollar bill test." |
| Latch won't engage or is loose | Misaligned striker plate or worn latch mechanism | Low | Check alignment and tighten the latch assembly screws. |
| Door is hard to lock or unlock | Swollen door (heat) or misaligned lock parts | Low to Medium | Lubricate the lock and check alignment with the striker plate. |
This chart should help you identify whether you're looking at a quick fix you can handle this afternoon or a more complex issue that might be better left to the pros.
Fixing a Sticking or Misaligned RV Door
It’s a sound every RV owner dreads: that awful scrape and shudder of a door that just refuses to close properly. A door that sticks, catches, or shows daylight through uneven gaps is probably the single most common issue we see roll into our Salt Lake City service center. It’s no surprise, really. After a few trips on Utah’s beautiful but often bumpy roads, the whole RV frame can twist and settle just enough to throw the door out of whack.
But don't start imagining a huge repair bill just yet. Most of the time, fixing this is a matter of small, simple adjustments you can handle yourself with a few basic tools. Believe it or not, it's usually a game of millimeters.
How to Check and Adjust Your Door's Fit
First things first, close the door and take a good, hard look at the gap running around the entire perimeter. Is it nice and even on all four sides? Now, open and close it slowly a few times. Pay close attention. Pinpoint exactly where it first makes contact with the frame and listen for that tell-tale scraping sound.
More often than not, the culprit is a misaligned striker plate—that little metal piece on the door frame where the latch connects.
- Grab a screwdriver and loosen the screws holding the striker plate, but just enough so you can slide it around.
- Gently nudge the plate up, down, in, or out to better line up with the door's latch mechanism.
- Tighten the screws back down and test the door. You might have to repeat this a few times to get it perfect, but it's worth the patience.
This simple tweak fixes a surprising number of sticking door problems. If the door is still severely out of line, you may need to adjust the hinges themselves, which follows a similar process of loosening, adjusting, and re-tightening.
When RV door problems involve alignment, small dimensional tolerances matter. Lippert’s installation guidance says the camber, or angle, should be adjusted whenever the gap along the handle-side vertical edge is less than 1/8 inch or more than 1/4 inch anywhere along the door. You can read more about these precise RV door replacement and adjustment standards on their blog.
This diagram shows the basic diagnostic process our own technicians use to start troubleshooting.
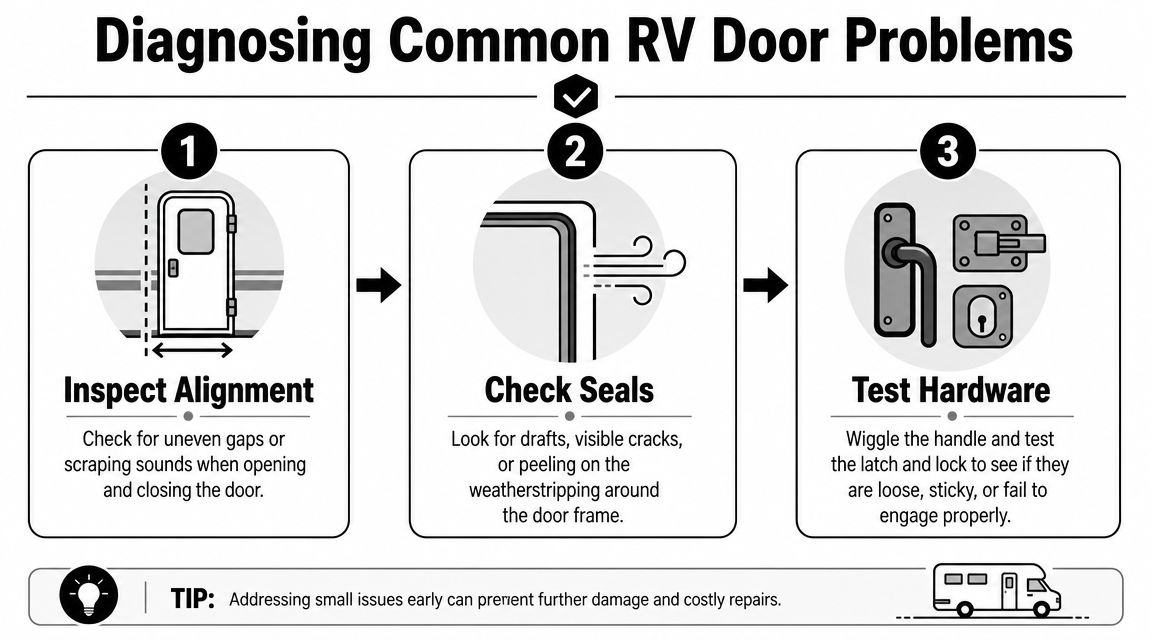
As you can see, a solid RV door repair always starts with a thorough check of the alignment, seals, and all the hardware. If your rig has a sliding door that’s giving you grief, the core ideas are the same—clean tracks and well-maintained rollers are your best friends. For a really great, detailed guide on that, check out this Sparkle Tech patio door help page.
Replacing Latches, Locks, and Handles
A busted paddle latch or a deadbolt that just spins in place is a problem you can't ignore. It's a real security issue, whether your RV is parked in your driveway in Salt Lake City or you're miles from anywhere near the Great Salt Lake. A lock that doesn't lock is just a handle.
The good news is that replacing most RV door hardware is one of the easier DIY jobs you can tackle. Most lock assemblies come in complete kits, so you aren't hunting for tiny, individual parts. All you really need is a Phillips head screwdriver and a bit of patience. While RV-specific, some general principles apply across all kinds of hardware; this guide on choosing the right fence and gate hardware has a good breakdown of latch and hinge basics that can be useful background reading.
Picking and Installing the Right Hardware
The single most important step happens before you even pick up a tool. When you head to the parts counter here at Motor Sportsland, bring your old lock assembly with you. If you can't, at least have several clear photos and precise measurements of the cutout in your door. This is the only way to guarantee a perfect match. RV makers use a handful of standard sizes, but there are always outliers.
With the new hardware in hand, the replacement is pretty straightforward.
- Get the old lock out. You'll see a few screws on the interior side of the handle. Just back those out, and the whole assembly—the inside plate and the outside handle—should come apart. Sometimes a little wiggling is required if it's been in there a while.
- Slide the new one in. Fit the new exterior handle into the opening from the outside of the door. Then, line up the interior plate and latch from the inside.
- Secure and test it. Thread the new screws in, but don't tighten them all the way just yet. Close the door and test both the latch and the deadbolt. Does it catch the striker plate smoothly? If everything feels right, go ahead and tighten the screws down. If not, you may just need to loosen the striker plate on the frame and adjust its position slightly.
A pro tip from our service team: The vibrations from just driving down the road can work screws loose over time. To prevent your new handle from getting wobbly, put a drop of non-permanent thread locker on the screws before you tighten them for the final time. It’s a simple step that saves you a headache later.
How to Replace Worn-Out Seals and Weatherstripping
That unwelcome draft you feel on a chilly night near Jordanelle Reservoir? It's more than just a minor inconvenience—it's a clear signal that your RV’s door seals are giving up. Over the years, the rubber weatherstripping around your door frame gets compressed, cracked, and brittle. This breakdown lets in cold air, rainwater, and even bugs.
Ignoring a failing seal is a gamble. A persistent water leak, no matter how small, can lead to delamination and rot in your door and wall. That's a far more expensive and complicated RV door repair down the road. Thankfully, replacing the seals is one of the easiest and most affordable projects you can tackle to protect your investment.
Choosing and Installing Your New Seals
Your first job is to get that old, hardened weatherstripping out of the way. Grab a plastic putty knife or a non-marring scraper and gently pry it off, taking care not to gouge the paint on your door frame. Once the old seal is gone, you'll need to clean the channel thoroughly with an adhesive remover to get rid of any sticky residue. A clean surface is key to a good bond.
Next comes selecting the right replacement seal. You’ll be surprised at how many different profiles exist—D-shaped, P-shaped, double-bulb, and countless others.
- Bring a sample: The absolute best way to guarantee a perfect match is to snip off a small piece of your old seal. Bring it with you to our Motor Sportsland parts counter, and we'll match it up.
- Measure twice: Pay close attention to the new seal's bulb diameter and base width. It needs to fit snugly in the channel without being forced.
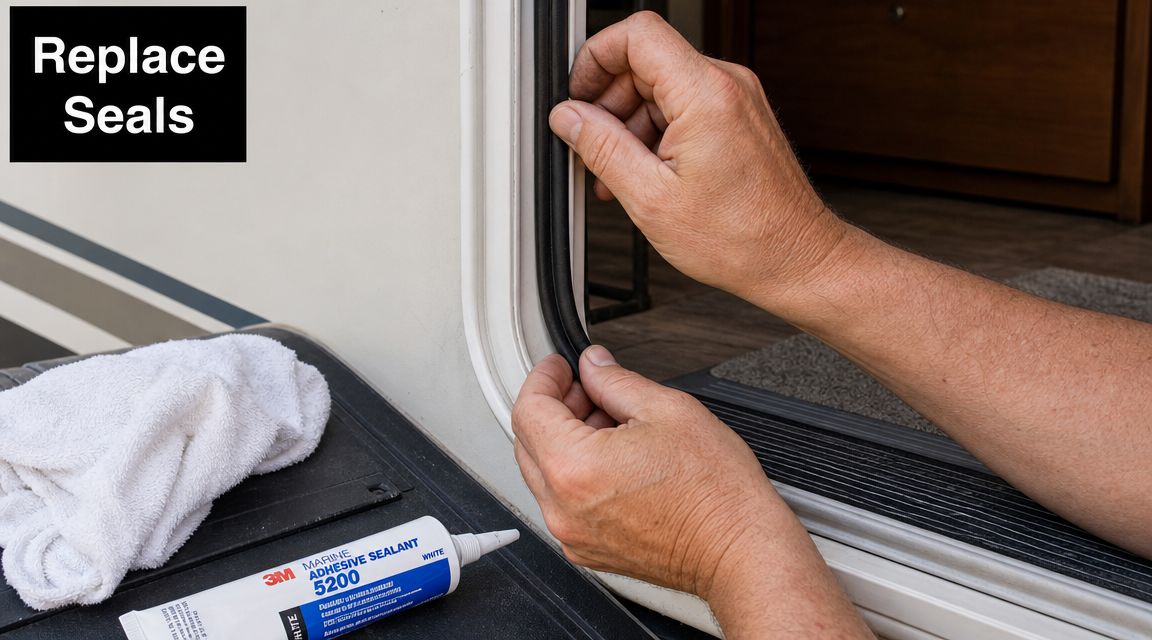
Most modern seals are a simple peel-and-stick application. Start at the bottom center of the door frame, pressing the new seal firmly into its channel as you work your way around. The most important tip here is not to stretch the material as you apply it; this can cause it to pull back and create gaps later on. For more tips on creating a perfect, watertight barrier, our guide to using Dicor self-leveling sealant shares some similar principles that you might find helpful.
The Dollar Bill Test: Here's a classic trick to check your work. Once the new seal is in, close the door on a dollar bill. Try to pull the bill out. If it slides out with no resistance at all, your seal isn't tight enough in that spot. A good, tight seal will create a noticeable drag on the bill.
Repairing Your Screen Door and Inner Panels
Nothing beats letting that fresh Utah mountain air in, but you definitely want to keep the bugs out. That's the screen door's job, but its lightweight design means it takes a beating and is often the first part of the door assembly to show wear, from a tiny tear in the mesh to a cracked plastic slider.
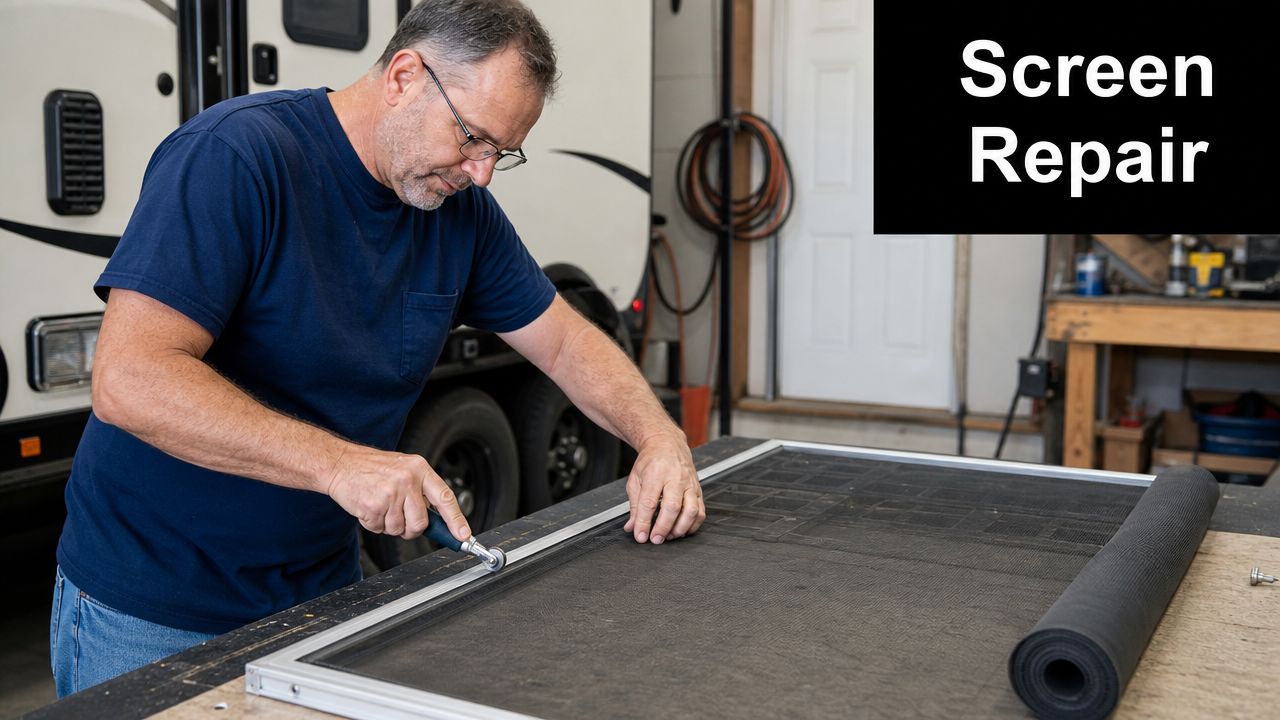
Thankfully, most of these are straightforward fixes you can handle yourself. A torn screen is a classic RV door repair. You can grab a roll of screen mesh and a simple screen rolling tool from our parts department and have it looking brand new in less than an hour. If you're new to this kind of fix, guides on door bug screens can be a great starting point. This guide from Sparkle Tech window screen service offers some excellent pointers.
Addressing Hidden Damage
While you're inspecting the screen, take a closer look at the main door's inner panel, especially along the bottom. If you feel any soft spots or see discoloration and peeling vinyl, you're likely looking at some wood rot. This is almost always caused by a slow, unnoticed water leak. It might look like a disaster, but the damage is usually very localized.
Believe it or not, these kinds of repairs can be incredibly affordable. The DIY history of RVing is filled with stories of simple, effective fixes. One travel-trailer owner documented a complete repair of a rotted door corner for just $1.67 by swapping out a small piece of wood and resealing the area. It’s a great example of how what seems like major damage can be a small project. You can see how they did it in this travel trailer door repair project.
The job involves pulling off the door's interior panel, carefully cutting out only the damaged wood, and then fitting a new piece in its place. Once the new wood is in, you seal everything up tightly to prevent future leaks. It's a very manageable project that saves you a fortune compared to a full door replacement.
Knowing When to Call in the Pros
Look, we're all for rolling up your sleeves and tackling a good DIY project. Fixing a simple latch or replacing a seal can be incredibly satisfying and save you a trip to the shop. But here's the thing: the real trick is knowing when a small problem is actually a symptom of something much bigger.
Pushing a DIY fix too far can turn a simple repair into a major, costly headache. An RV door repair often involves more than just the door itself—it's tied directly to the structural integrity of your rig's wall.
Red Flags That Mean It's Time for a Professional
If you come across any of these situations, it's a clear sign to put the tools down and give us a call. These problems usually demand specialized equipment and a deep understanding of RV construction that you just can't get from a quick online video.
- A Bent or Warped Door Frame: Did you have a little run-in with a low-hanging tree branch, or was the RV in a minor fender-bender? If the entire door frame is visibly twisted or bent, this isn't a simple alignment tweak. Trying to force it back into shape can seriously damage the wall structure. Our techs have the proper frame-straightening tools to handle this safely.
- Serious Water Damage: Be on the lookout for delamination (those bubbles or waves on the fiberglass siding), soft spots in the wall around the door, or any obvious wood rot. This means water has been getting in for a while and has compromised the wall's core. We'll need to fix the underlying structure and hunt down the source of the leak to make sure it doesn't happen again.
- Tricky Electrical Lock Failures: Many modern RVs feature keyless entry pads or electronic locks. If you've already tried fresh batteries in the lock and your fob, but the system is still dead, the culprit is likely buried in the RV's wiring or the main control module.
Our service guys have a saying: "Don't fight it." If a part refuses to budge, or a repair feels like you're using brute force, stop. That's your RV telling you there’s a bigger issue that needs an expert eye.
These are exactly the kinds of tough jobs our team is built for. When you hit a wall and a repair feels over your head, let us take care of it so you can get back on the road with confidence. You can learn more and schedule an appointment with our RV service experts at our Salt Lake City or Spanish Fork locations.
Frequently Asked Questions About RV Door Repair
Even after you've tackled a fix, you might still have a few lingering questions about your RV door. It’s completely normal. Over the years, our service team at Motor Sportsland has heard just about everything, so we've put together the answers to the questions we hear most from our fellow Utah adventurers.
How Much Does a Professional RV Door Repair Cost in Utah?
This is the big one, and the honest answer is: it depends. The cost really hinges on the problem. A quick latch adjustment might just be a small part of a standard service charge. A full door replacement, on the other hand, is a much bigger job and can run from $800 to over $2,500, depending on your specific RV model.
At Motor Sportsland, we believe in total transparency. You’ll always get a clear, detailed quote from us before we ever pick up a tool.
What’s the Best Thing to Use on a Squeaky RV Door Hinge?
We get this one a lot. Your best bet is a silicone-based lubricant spray.
A common mistake is grabbing a can of WD-40, but you really want to avoid general-purpose oils for this job. They tend to attract dirt and grime, which can gum up the works and make the problem even worse down the road. A quick shot of silicone spray on the hinges every few months is a fantastic bit of preventative maintenance.
Pro Tip: While you have the spray out, give the moving parts of your lock a quick spritz, too. It helps prevent sticking and keeps the mechanism operating smoothly, which is a lifesaver during Utah’s wild temperature swings.
Why Does My RV Door Get Harder to Close When It’s Hot?
If you've noticed this, you're not imagining things! This is a classic case of thermal expansion. When the summer sun beats down, the materials in your door and its frame expand ever so slightly. This can make the fit feel much tighter and the door harder to operate.
Usually, it returns to normal once things cool down. If it becomes a constant battle, though, the door's alignment might need a minor adjustment to account for the swelling. That’s an easy fix our service team can handle for you.
Where Can I Get a Replacement Key for My RV Door?
First, check your existing keys—most have a small code stamped right onto the metal. Just bring that code into our parts department in Salt Lake City, and we can usually cut a new key for you on the spot.
If you’ve lost all the keys (it happens!), don't worry. We'll likely need to replace the entire lock cylinder. It sounds like a big deal, but it's a straightforward repair we can perform quickly to get you back on the road.
