
Utah Expert: How to Level Travel Trailer in 2026

You pull into camp tired, back the trailer into what looks like a decent spot, and ten minutes later the floor feels crooked, the entry door wants to swing, and your coffee slides toward the sink. That's usually the moment new owners search how to level travel trailer and realize setup is more than dropping the jack and calling it good.
At our Salt Lake City service center, we talk new owners through this all the time. Utah campsites can be forgiving, but they can also be rocky, sloped, soft after rain, or just uneven enough to make a simple setup frustrating. The good news is that leveling a travel trailer isn't complicated once you understand the sequence and the decision-making behind it.
Comfort is the obvious reason to level. The less obvious reason is that your trailer works better when it's sitting properly. Doors, drawers, shower drainage, and appliance operation all behave more like they should when the trailer isn't twisted or leaning. The process itself is straightforward once you build the habit. You level side to side first, then front to back. If you keep that order, use the right tools, and know when a campsite just isn't worth forcing, setup gets much easier.
That Tilted Feeling Why Leveling Your Travel Trailer Matters
Most owners notice bad leveling first thing in the morning. You wake up feeling like you rolled downhill all night, cabinet doors drift open, and anything set on the counter wants to migrate. That annoyance is real, but it's also your trailer telling you the setup wasn't finished correctly.
A level trailer feels better to live in, but it also puts less stress on the parts that need stable positioning to work normally. New owners often focus on whether the bed feels flat and miss the bigger picture. Tire position, site selection, and where the trailer's weight settles all affect how comfortable and secure the trailer feels once you start using it.
At Motor Sportsland, we see the same pattern with first-time buyers around Salt Lake City and up into the mountain campgrounds. They assume leveling means one quick adjustment. It's a repeatable process with a sequence, a few basic tools, and a little patience.
A trailer that feels only “slightly off” outside usually feels much more off once you're standing inside it.
That same logic shows up outside the RV world too. If you've ever looked at a shipping container levelling guide, the principle is familiar. Stable placement starts with the ground and the load path, not with forcing the structure into place afterward.
Your Essential Travel Trailer Leveling Toolkit
A smooth campsite setup starts before you ever leave home. The owners who have the easiest time leveling aren't guessing with random gear from the garage. They keep a dedicated leveling kit in the pass-through and use the same routine every trip.
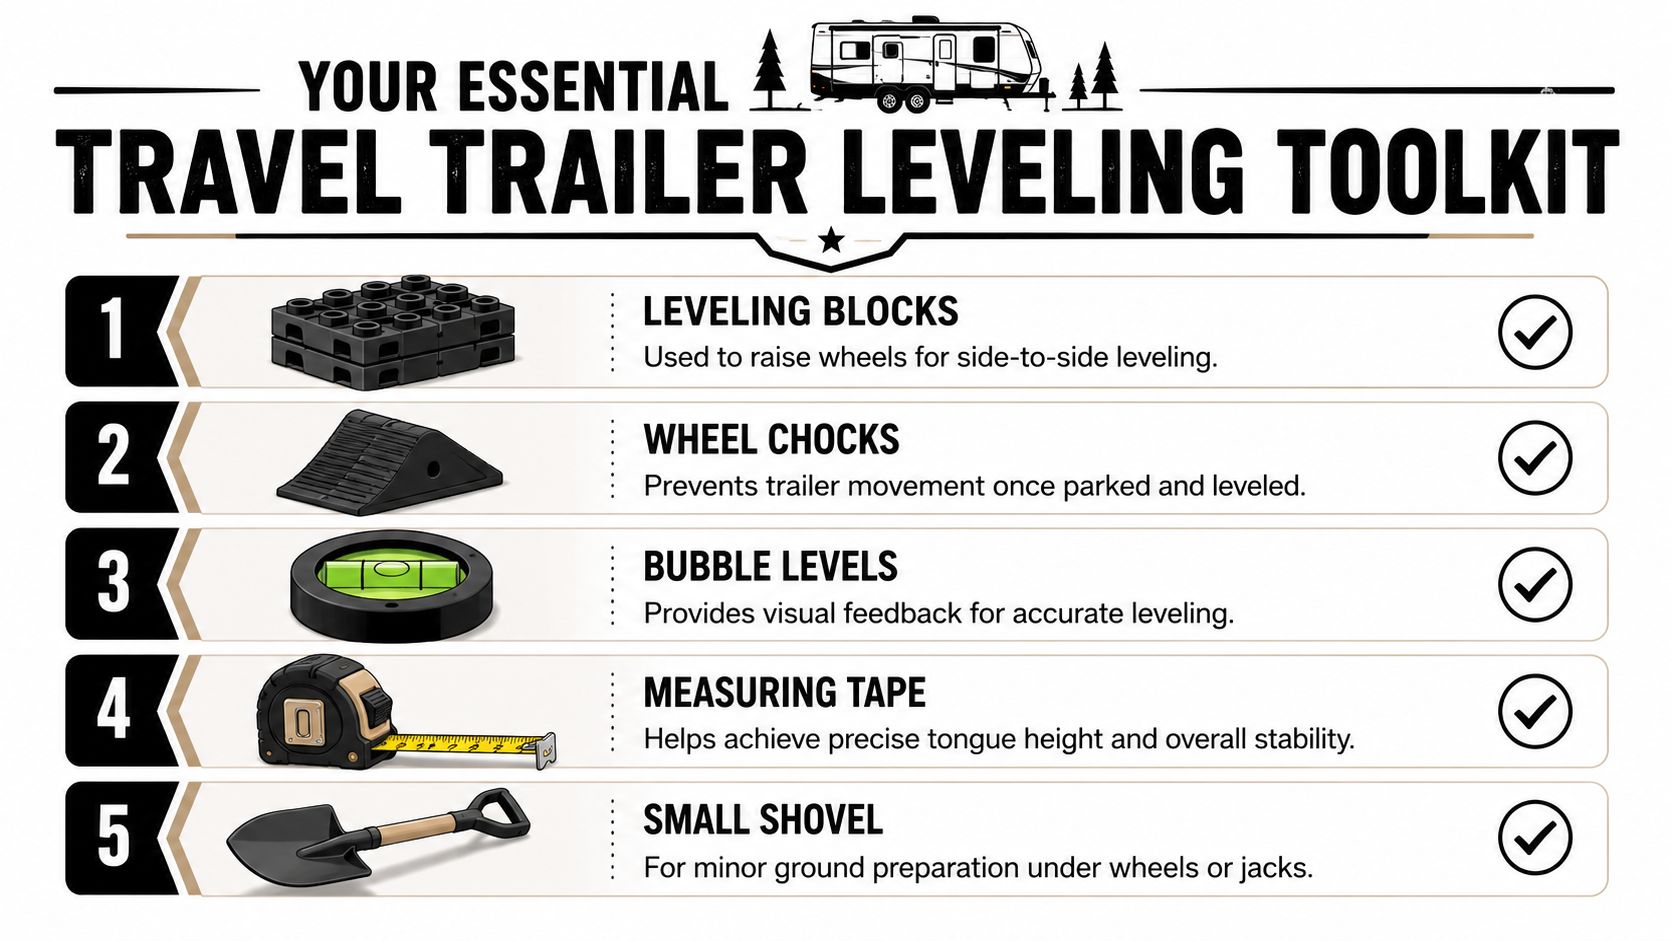
The core gear to keep on board
You don't need a truck bed full of accessories, but you do need the basics:
- Bubble level: This gives you a quick visual read on side-to-side and front-to-back attitude. A simple stick-on level or a small handheld level both work.
- Leveling blocks or ramps: These raise the low side tires for side-to-side correction.
- Wheel chocks: These keep the trailer from moving once it's positioned.
- Measuring tape: Handy when you want repeatable tongue height or want to confirm clearance.
- Small shovel: Useful for minor site cleanup and limited ground prep.
What works best in real campsites
Blocks and ramps both have their place. Interlocking plastic blocks are easy to stack and store. Wood planks or cut 2x material can work too, especially if you already have them, but they're bulkier, dirtier, and less uniform. For many owners, the deciding factor is consistency. Manufactured leveling blocks are easier to repeat from one campsite to the next.
Our local advice for Utah campers is simple. Carry more blocks than you think you'll need. Sites near the Wasatch Mountains, reservoir campgrounds, and older state park loops often look flatter from the driver's seat than they really are.
Practical rule: If your leveling kit feels slightly over-prepared in your driveway, it'll probably feel just right at camp.
If you're still learning how your tow vehicle and trailer behave together, trailer weight matters more than people realize. A lighter trailer can be easier to position precisely on blocks, while a heavier trailer may need slower, more deliberate movements. This guide on RV dry weight helps new owners understand why setup and towing feel different from model to model.
Build a go-kit, not a loose pile of parts
The easiest system is one tote, one bag, or one dedicated storage compartment with the same tools every time. A good go-kit usually includes:
- A pair of gloves: Better grip when blocks are dusty or muddy.
- A kneeling pad: Gravel and wet dirt get old fast.
- A flashlight or headlamp: Because setup doesn't always happen in daylight.
- A small brush: Useful for clearing gravel from under blocks or chocks.
That last bit matters more than many realize. Leveling gets frustrating when you're hunting for one missing chock in the dark.
Mastering Side-to-Side Leveling on Uneven Ground
This is the part that makes or breaks the whole setup. If the trailer isn't leveled side to side first, everything after that feels like chasing the problem instead of fixing it.
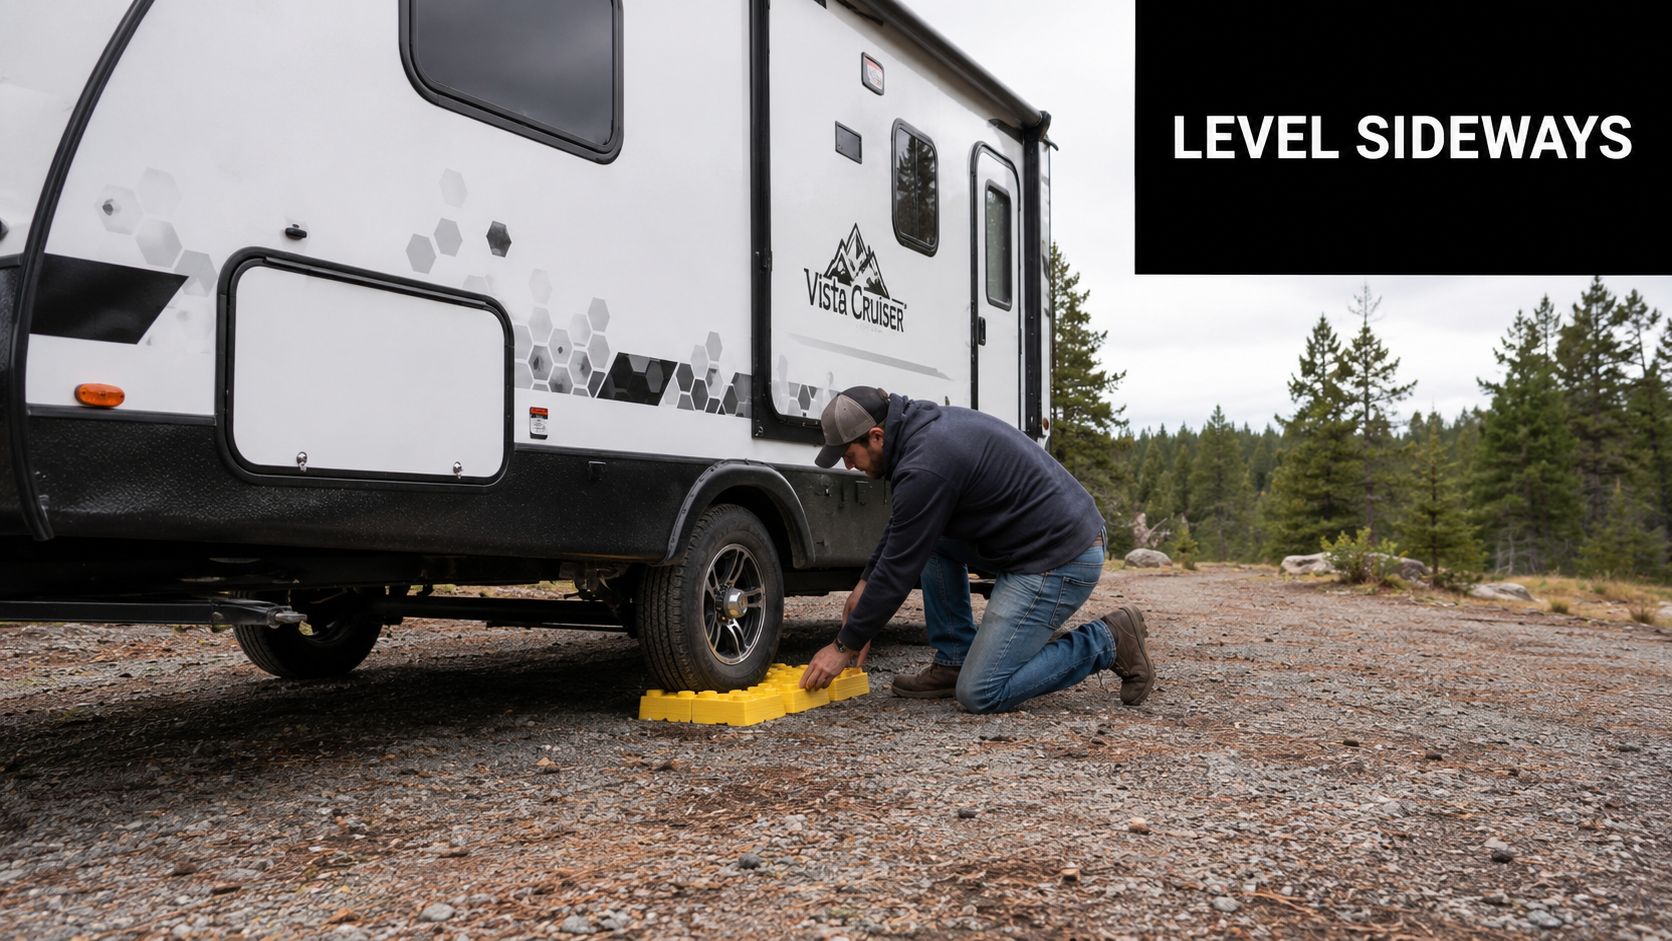
A travel trailer is typically leveled in two distinct stages. First side to side with leveling blocks or ramps, then front to back with the tongue jack. That sequence matters because the trailer needs to be stabilized before you unhitch. Guidance on properly leveling a travel trailer also notes chocking after the trailer is on the blocks, with some guidance calling for chocks on the downhill side and some recommending chocking both sides before disconnecting.
Start by choosing the least-bad part of the site
You rarely get a perfect campsite. What you want is the flattest, firmest section available. That means looking for a place where the trailer can sit with the smallest correction, not necessarily the spot that looks nicest out the window.
On Utah sites with gravel pads, the obvious parking area is usually close enough. On mountain or forest sites, though, a few feet forward or back can make a big difference. If the site falls away hard on one side, don't force the trailer into the first position you try.
A useful comparison comes from other foundation work. If you've ever read about leveling ground for sheds and garages, the lesson is the same. Start with the best available surface. Don't expect supports and blocks to fix a fundamentally bad base.
Read the low side before you move
Set your level inside the trailer on a hard, reliable surface. Floor, countertop, or another known-flat surface works. Then check which side is low.
Once you know the low side, pull forward enough to place blocks or a ramp where the low-side tires will climb onto them. It's usually easier to add one block than to overshoot and start over, so stay conservative at first.
A spotter helps here, especially on tandem-axle trailers or tight sites. One person drives slowly. The other watches tire position and block alignment.
Back or pull onto the blocks carefully
Move slowly and keep the tires straight as they climb the blocks. If the tire starts to push the stack out of place, stop and reset. Don't try to “bump” your way onto a crooked stack.
After the trailer is on the blocks, re-check the level inside. If you're still off, adjust and repeat. This is normal. New owners sometimes think they're doing it wrong because they have to reposition once or twice. They aren't.
Here's a useful visual walkthrough if you want to see the motions and pacing in action:
Chock before you unhitch
This is the safety point people rush past when they're tired. Once the trailer is correctly positioned on the blocks, chock the wheels before disconnecting from the tow vehicle.
A good routine is:
- Confirm tire placement: Make sure each tire is fully supported on the blocks or ramp.
- Set wheel chocks firmly: Push them tight against the tire, not just near it.
- Check for movement: If the trailer shifts at all, reset before unhitching.
- Keep the tow vehicle connected until you're secure: Don't disconnect early just because the bubble looks close.
If the trailer can still roll, you're not at the unhitch stage yet.
That order matters because side-to-side leveling is really about getting the trailer safely established on the site. Once that base is set, the front-to-back adjustment becomes simple.
Fine-Tuning Your Level Front to Back
Once the trailer is sitting correctly side to side, front-to-back leveling is the easier half of the job. For this step, the tongue jack does the work.
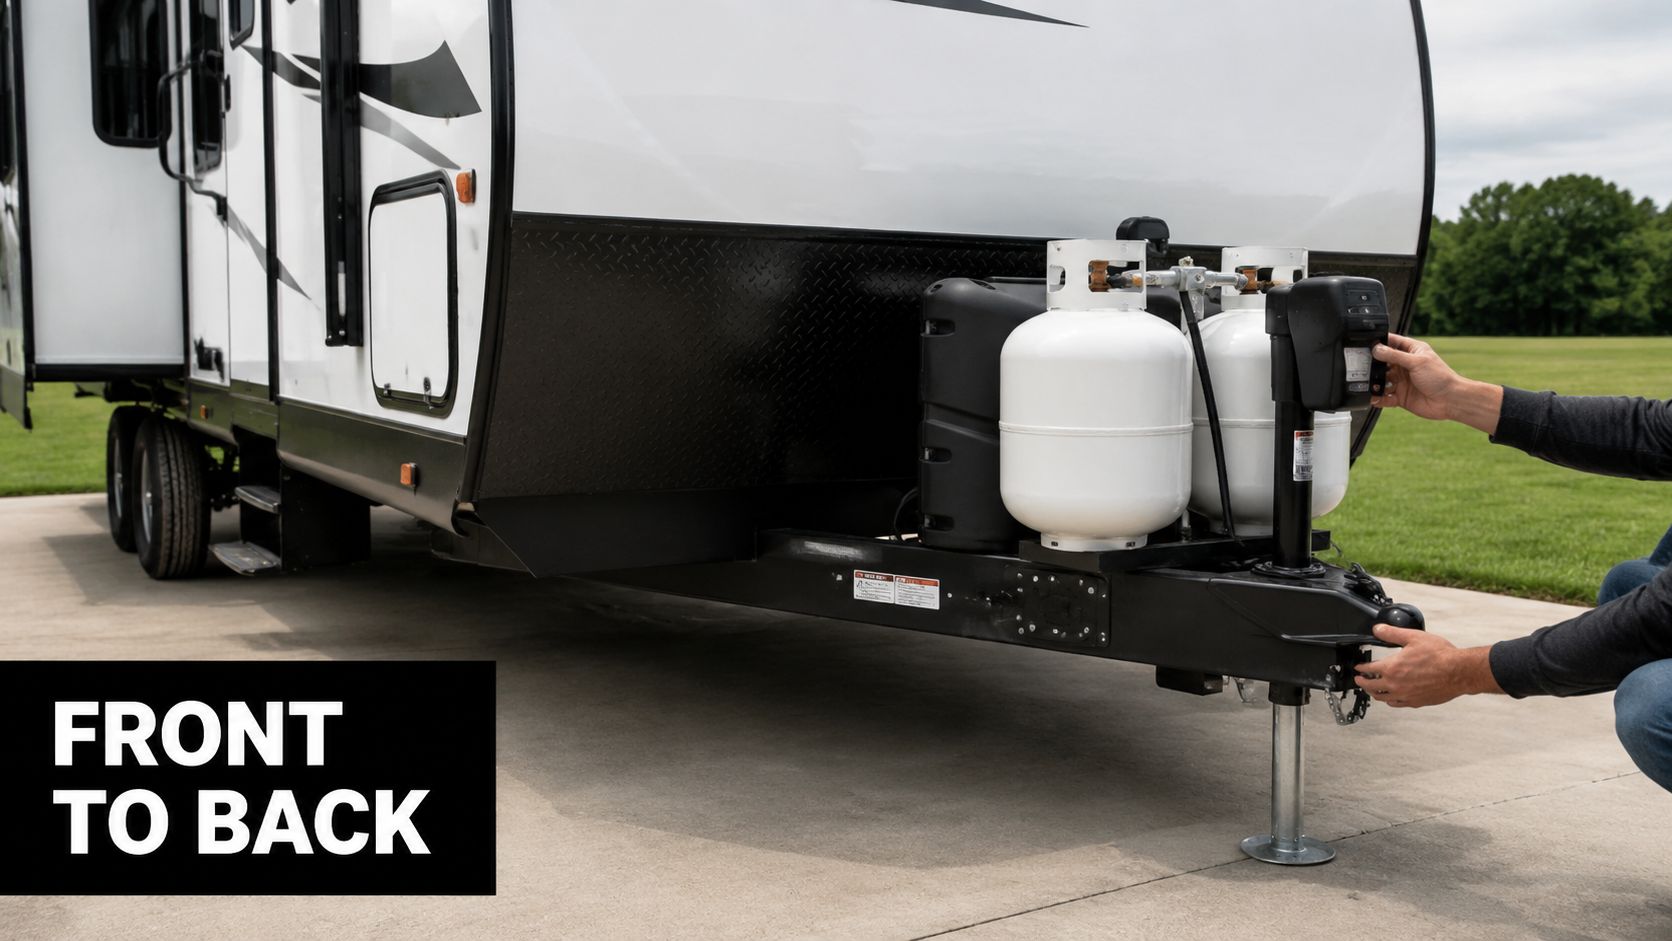
After the wheels are chocked and the trailer is secure, unhitch from the tow vehicle. Then use the tongue jack to raise or lower the front of the trailer until your level reads correctly front to back.
Use the tongue jack for lifting
The tongue jack is built for this job. It changes the trailer's front height in a controlled way, and it's the right tool for the second half of the leveling process.
A few habits make it easier:
- Move in small increments: Big jack movements can overshoot quickly.
- Re-check after each adjustment: Don't assume a little movement equals a little correction.
- Watch your footing and jack pad contact: If the ground is loose, make sure the jack foot is staying planted.
A stable jack pad or block under the tongue jack can help spread the load on softer surfaces. That's especially useful at campsites with wet soil or loose gravel.
Don't use stabilizer jacks to level
This is one of the most common mistakes we see in the shop. The corner stabilizers are not for lifting the trailer into level. They are there to reduce rocking and movement after the trailer is already level.
Our service team sees bent stabilizer jacks from this mistake all the time. They're for stability, not lifting.
Shop advice: If you can see the stabilizer trying to raise the trailer, you've asked it to do the wrong job.
That same idea also matters when owners start dialing in hitch setup and trailer attitude for towing. If you want a clearer sense of how tongue height and hitch geometry affect handling, this overview of the E-2 weight distribution hitch is a helpful next read.
Lower stabilizers last
When the trailer is level front to back, lower the stabilizers until they make firm contact. Snug is enough. You want support, not lift.
A good final feel check is to step inside and walk corner to corner. If the trailer still has too much bounce, lower the stabilizers a touch more. If the stabilizer starts flexing the frame or lifting, back off.
Common Leveling Mistakes and Pro Tips for Tough Sites
Most leveling guides stop at the basic sequence. Real camping gets messy when the site is soft, the slope is ugly, or the ground changes under load. That's where judgment matters more than memorizing steps.
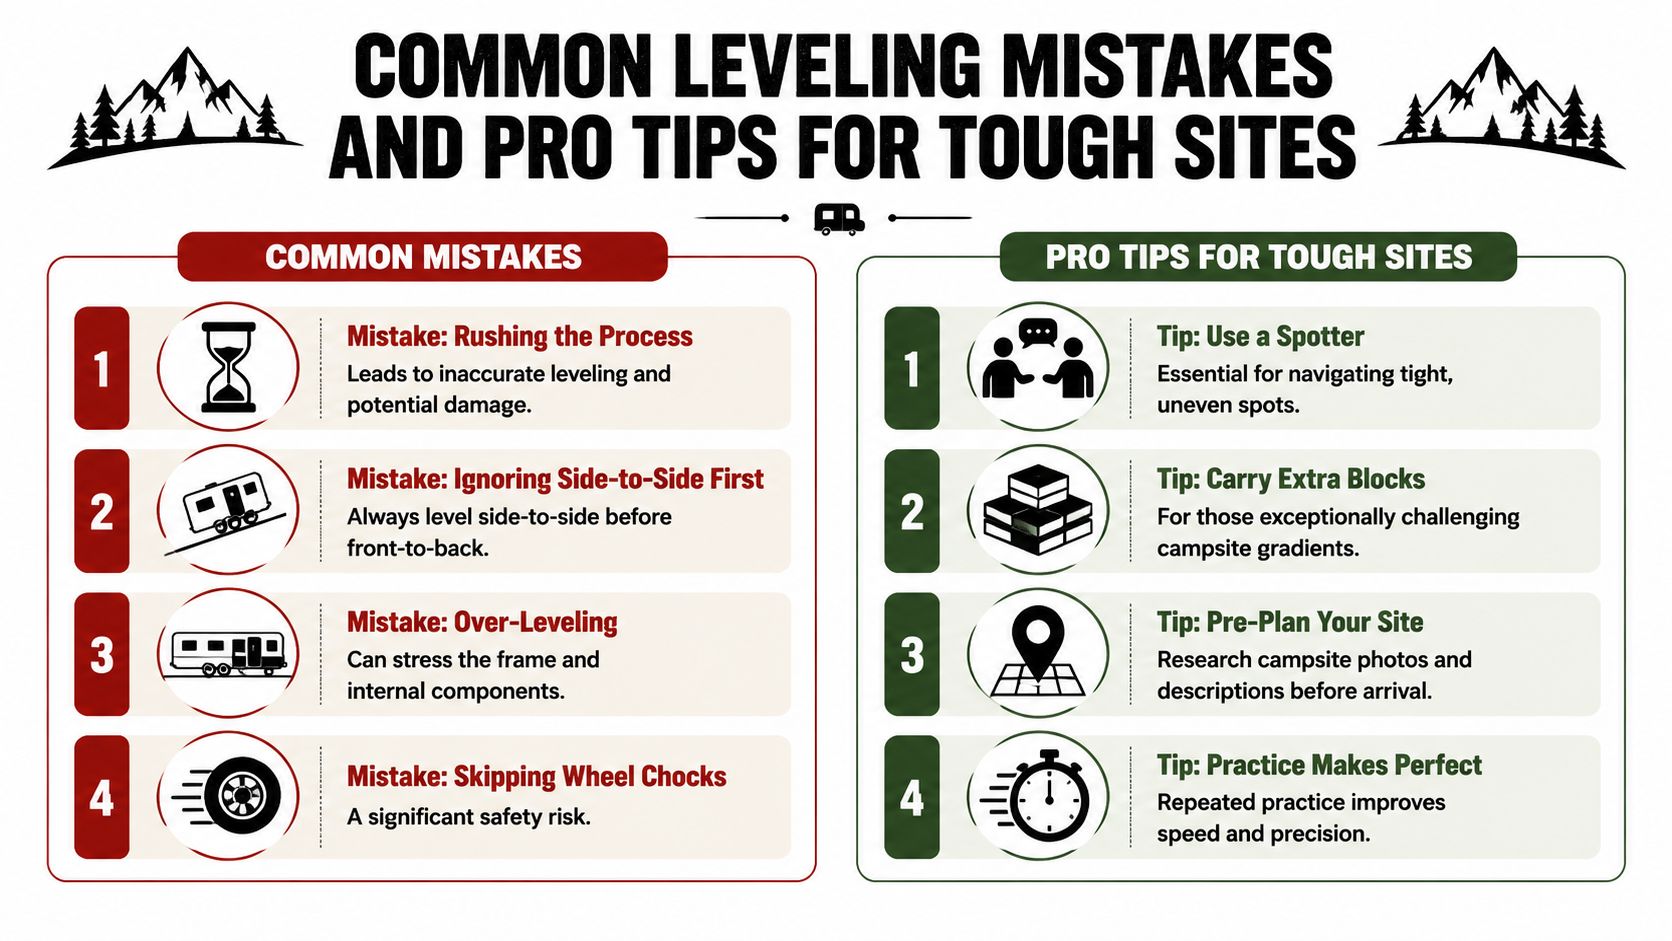
Guidance on leveling a travel trailer at the campsite points to an important reality that many owners eventually learn the hard way. On soft ground or steep pitches, it can be smarter to dig a trough on the high side or reorient the trailer rather than stack blocks excessively. That's one of the biggest gaps in generic advice. People want a hard threshold for when a site is too far off-level, but most guidance doesn't give one.
When blocks stop being the right answer
Stacking blocks higher and higher feels productive until it doesn't. If the stack looks unstable, if the tire approach is awkward, or if the trailer feels perched instead of planted, stop and rethink the site.
In practice, your options are usually:
| Situation | Better move |
|---|---|
| Mild side slope on firm ground | Use leveling blocks normally |
| Soft ground under blocks or jack | Spread load and reassess site firmness |
| Steep pitch with awkward tire climb | Reposition or reorient trailer |
| High side is only slightly elevated | Minor trough work may help |
| Site still feels risky after setup attempts | Choose another position or another site |
That decision matters at places like Jordanelle, Bear Lake, and older mountain campgrounds where pads can be uneven or eroded. Sometimes the smartest move is not a fancier technique. It's parking differently.
Soft ground changes everything
Soft soil can turn a good setup into a bad one after sunset. Blocks settle. Jack pads sink. A trailer that felt level at dinner can feel off by bedtime.
Watch for these signs:
- Blocks pressing into mud or wet soil: The load may keep settling.
- Tongue jack sinking unevenly: Front-to-back level can drift.
- Visible tire squirm on stacked blocks: Reset before putting more weight on them.
- Loose gravel rolling out from under a block: Clear and rebuild the base.
A small shovel earns its place in your kit here. Sometimes scraping loose material away or creating a cleaner contact patch helps more than adding another accessory.
Mistakes that cause frustration fast
A few errors show up over and over:
- Rushing the first attempt: Quick setups often become longer setups because the trailer has to be repositioned.
- Ignoring side-to-side first: Owners try to fix everything with the tongue jack and never get a stable result.
- Skipping a re-check after setup changes: Slide-outs, foot traffic, and settling can all change the feel of the trailer.
- Over-tightening stabilizers: This can create stress instead of support.
- Camping on a bad site out of stubbornness: Sometimes the right move is to relocate.
If you camp often without hookups or on rougher terrain, our article on camping off the grid pairs well with leveling because site selection and self-sufficiency go hand in hand.
Some campsites are inconvenient. A few are simply poor candidates for safe leveling. Knowing the difference saves a lot of grief.
A note on automatic leveling systems
For owners who are tired of the manual routine, automatic leveling can be worth looking at. It doesn't remove the need for good campsite judgment, but it can reduce setup effort and improve consistency.
That option makes the most sense for campers who move often, arrive late, or just want fewer setup variables. It's not magic, and it won't fix an unlevelable site, but it can make a decent site much easier to manage.
Your Final Leveling Checklist and Next Steps
At the campsite, simple beats clever. If you keep the routine in the same order every time, leveling becomes one of those tasks you stop dreading.
Use this quick checklist:
- Park on the flattest part of the site
- Check side-to-side level inside the trailer
- Place blocks or ramp under the low-side tires
- Move onto the blocks and re-check
- Chock the wheels securely
- Unhitch from the tow vehicle
- Use the tongue jack to level front to back
- Lower stabilizers for support only
- Do one final walk-through inside
If you like keeping handy setup references for trips and seasonal care, it can help to get your maintenance checklist mindset organized before camping season starts. The format is aimed at property upkeep, but the checklist habit translates well to RV setup and inspection.
Practice makes this process smoother. If your trailer still rocks, a jack looks bent, or your setup never feels right even on decent ground, professional inspection is a smart next step. If you're in the Salt Lake City area, our service team can inspect jacks, stabilizers, and related components. If you're ready to move into a trailer with easier setup features, you can also stop by our showroom and compare options in person.
Frequently Asked Questions About Leveling
Can I level a travel trailer with just the stabilizer jacks
No. Stabilizer jacks are meant to reduce rocking after the trailer is level. They are not designed to raise the trailer into position.
Do I always need leveling blocks
Not always, but most campsites aren't perfectly flat. For side-to-side correction, blocks or ramps are one of the most common and useful tools to keep on board.
What if my campsite is too far off-level
Don't force it. If the trailer needs an excessive stack of blocks, feels unstable, or the ground is too soft, reposition the trailer or choose a different part of the site. On some sites, limited ground prep or a different orientation works better than stacking higher.
Should I unhitch before I chock the wheels
No. Get the trailer positioned on the blocks, then chock the wheels securely before disconnecting from the tow vehicle.
Is a phone app enough to check level
A phone app can help as a backup, but many owners prefer a dedicated bubble level because it's simple, quick, and always ready.
Do slide-outs affect leveling
They can affect how the trailer feels and settles. After you complete setup, it's smart to do a final check and make sure nothing shifted.
Are automatic leveling systems worth it
For some owners, yes. They're especially appealing if you camp often, move frequently, or want less manual setup. They still don't replace good campsite selection.
If you want help with trailer setup, jack concerns, or choosing a camper that's easier to live with on Utah campsites, contact Motor Sportsland. You can browse inventory, schedule service, or visit our Salt Lake City area locations to talk through your setup with a team that works with RV owners every day.
